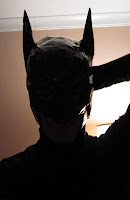
 I'm planning on an epic (hopefully) batman costume for this Halloween. To start, I made a mask. Looking up other costumes online I found a variety of options, but this one was by far the easiest and cheapest. You could easily use this basic system to make pretty much any custom fit costume headgear. All you need is: plastic grocery bag, paper grocery bag, cardboard (not much), duct tape (I used silver duct tape first, then black duct tape to finish).
Step 1) Form: Put the plastic bag on your head (make sure to cut space for your mouth to breathe). Wrap your head in duct tape. Make sure the tape is nice and tight. This will make a very nice mold of your head. You will want to include your forehead, but do not cover your eyes/mouth/etc. When you are happy with the wrap, take it off your head (you may need to cut a slit down the back) and trim off excess plastic bag.
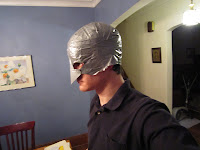 Step 2) Nose: To make the nose, I first made a bridge across the face of the mask using two pieces of duct tape stuck together (so it wouldn't stick to my face). Then, I cut out a nose with cardboard. Fit the nose over your own nose to size it before taping it to the mask. The nose in the actual batman mask is very severe, and it took me a few tries to get the right size, and even then I had to trim it down later to change the angle of it. This is definitely the trickiest part of the mask. Once you tape the nose onto the mask, you will want to cut out the duct tape behind it so that your nose can fit into it. At this time I also added (in the same fashion as the nose bridge) a chin strap to help the mask stay on.
 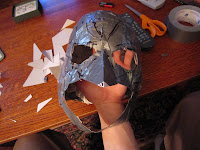 Step 3) Design: First, cut holes for the eyes. It's very easy to fill in mistakes (just use duct tape!), so don't worry about making them too big. Now that you have the basic shape of the mask, draw in where you want the 3D aspects of the mask to go. For the Dark Knight mask, this meant eyebrow ridges, cheekbone ridges, lines going away from the eyes in a sort of starburst, and two larger crests running over the top of the entire mask. Once the areas are drawn in, fill them in by rolling up strips of grocery bag and taping them over the places that need to stick out. At this point I only made small ridges, and added more to them after completing the ears. If at any point you mess up, you can use a scissors (carefully!) to trim down a part you don't like.
 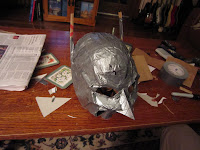 Step 4) Ears: The ears started as tubes of rolled up grocery bags. I taped them down a few times to get the correct placement and angle (pretty far back) and trimmed them for size. Once they were in the right spot, I added duct tape and more rolled up paper bag to give them the right volume and shape. Rolling up strips of grocery bag is how all the depth is added to the mask.
 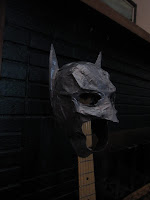 Step 5) Emphasize: Now that the ears, nose, and basic ridges were in place, the mask had all of its components. From here you just need to emphasize each part. The ridges are very extreme in the mask and during construction may seem almost grotesque. Again, if you think you over-did anything, you can use a scissors to trim back. It surprised me how large I had to make the face ridges before they looked right.
 Step 6) Color: As a final touch I coated the entire mask in black duct tape. I also colored in the lines along the edges of the duct tape with a black permanent marker.
See Part II of making the mask here
See the whole costume here
Direct Links to Specific Parts:
Batman Chest Plate
Leg Armor
Batarang
Bat Belt
Bat Gauntlets


Awesome tutorial!
ReplyDeletecan I use the same methods for a batgirl costume?
ReplyDeleteOf course!
DeleteGreaat share
ReplyDeleteThis is such an innovative and affordable way to create custom costumes.
ReplyDelete