
Helmet
Shield (Aspis, or Hoplon)
Spear (Dory)
Body Amour (Linothorax)
Greaves
For the original 300 costume, click here
For all costumes click here. For the Batman costume, click here.


 For all the Hoplite Costume posts click here!
  I started with 2 1/2 yards of a faux-leather halloween costume fabric (standard fabric roll wide, about 3 feet I think?). The entire costume is made by cutting away at this. There are two things to think about when starting out, which are how long the costume needs to be (knees to shoulders, over shoulders, and back down to knees) and how wide (the main body of the armor is as wide as your stomach/chest, the 'belt' goes around your back once and layers twice over your stomach). That said, I made my basic 't' shaped design. The main body of the armor is the long part, and the belt is the extensions out left and right on what will be the back side. The ends (front and back) of the armor will eventually be free-hanging straps. I measured my chest (measure to the base of your shoulder, not the ends of your shoulders) to determine how wide I needed to keep the fabric, and then my waist to see how long each side of the belt should stick out, then I started cutting.
 The armor is made up of 4 long straps that go front to back, and I wanted to re-create that but without actually using 4 individual pieces of fabric, so I cut from the shoulders down (front and back) to make the four straps, but did NOT continue them through the belt region, This gave me the look of having 4 straps and the belt will later cover the part where I did not cut. Keeping the entire piece solid like this means much less hassle later on and fewer knots to tie.

 Now done with the top of the armor, I moved onto the belt. The belt is fairly simple: The two flaps coming off the back of the armor are wrapped around to the front and tied down (using the same technique as the shoulder ties, just make two slits in the belt piece and also the piece you are tying it into and run the lace through). Once you've tied down the first belt piece in front, bring the second belt piece from the back have it overlap the first, then tie it down as well. I made the second belt piece into 3 straps by cutting it long-wise (and made one tie for each strap) and also made each end into a triangle. I thought it looked neater. The photos show the first belt tied in (left) and the second belt tied in (right).


 My Hoplite costume of course needs a shield, and I lucked out that when I first made my 300 costume a friend let me have their saucer sled which was exactly the size I needed for my shield. It was the easiest build ever: Take plastic saucer sled (about $10), drill 4 holes (two per side, to put in laces for holding shield on inside), spray paint brown, then lightly add gold spray paint to make a bronze-ish final color. I also added a spray on varnish to keep the paint from chipping too much. I used brown shoelaces tied through the holes to fit my arm and hand. Done!
 See all the Spartan Hoplite Costume articles here!
 First, I wrapped my legs in plastic garbage bags so I would have something to build the paper mache off of. Hoplite greaves should be custom-fit, so this way I would make them as accurate as possible.
 I mixed my paper mache (half warm water, half white glue), mixed it well, and cut up newspapers into inch-wide strips. I dipped the newspaper in the glue mix, used my fingers to wipe off excess liquid, and started laying the newspaper onto my shins. I paper mache'd from my ankles to the tops of my knees, and around the sides of my calves. I made the paper mache about 4 layers thick. Once I had my 4 layers, I waited about half an hour so the paper mache could dry enough to stay in the shape of my leg. Then I cut the garbage bags at the back of my leg and removed the greaves. I let them dry completely overnight by putting them over the backs of chairs.
 The next day I reinforced the greaves by putting a layer of duct tape over most of the greaves (but not the entire surface; I wanted to make sure the next layer of paper mache could fuse to the previous layer). Then I added another 4-layer round of paper mache.
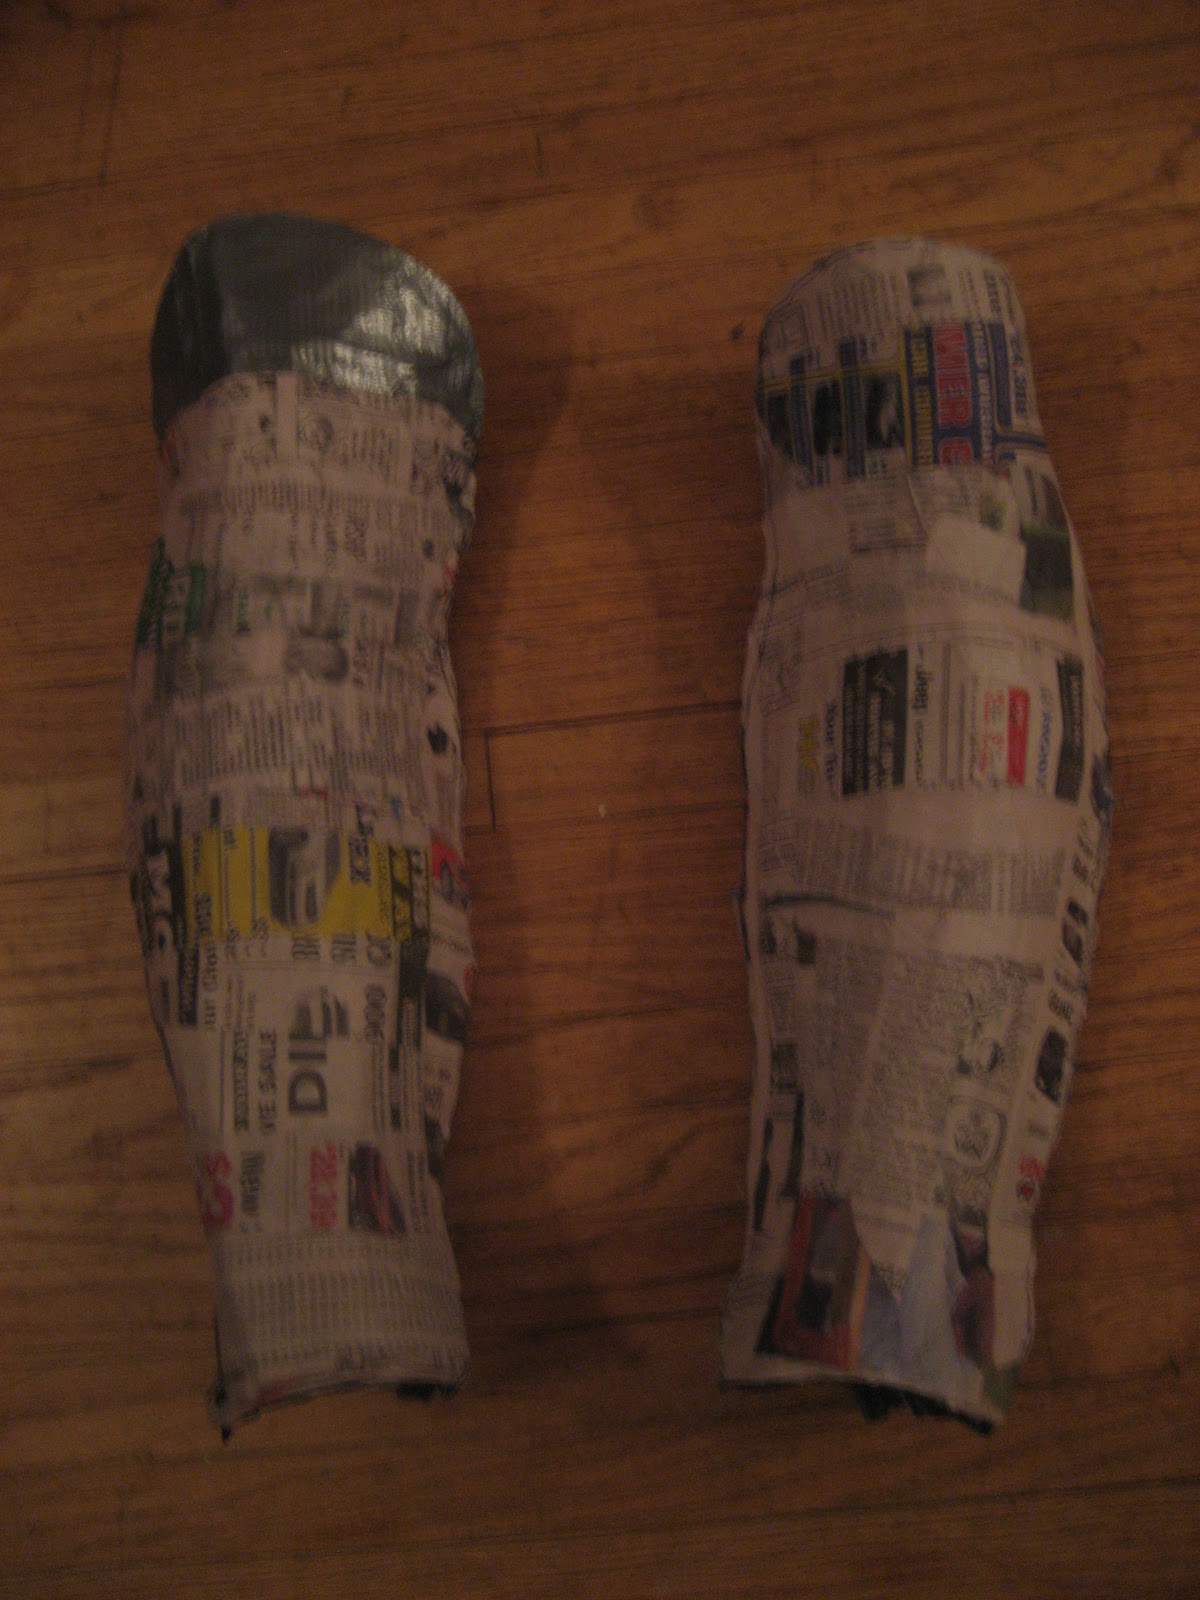 I repeated this a few more times, before I was finally satisfied with how thick and solid the greaves were. I then cut off the excess garbage bags and trimmed the greaves into the proper shape. It turned out I had made one of them too short, so I used duct tape to build a top (knee cap) and then put one final layer of paper mache over that (and also around the edges where I had cut the greaves out).
 Once the paper mache was dry, it was time to paint the greaves. I used an Xacto knife to make 6 holes in each greave for straps. I used spray paint to paint the greaves brown, then a light layer of gold over that for a final bronze-ish appearance.
 Finally the greaves were finished! They aren't perfectly smooth, or shaped, but they are decently strong and were super cheap and easy to make. It was also nice to experiment with a new medium and see how strong paper mache can be made to be if you layer it enough.
 See all the Spartan Hoplite Costume articles here!


 Once painted, I had only to finish the shaft of the spear. For this I sanded the shaft, then applied a layer of wood stain. I let it dry, sanded the shaft, then added another layer and repeated. All done!
  See all the Spartan Hoplite Costume articles here!
 Step 1) Find scaffold for helmet: I knew I needed something to build my helmet around, and didn't want to go the same route as the batman costume (where I made a duct tape mold of my head). So I went to Party America to try to find a cheap hat of some sort that would have enough structure to be able to build on it but not cost much. I was fortunate to find pretty much exactly what I was looking for in the form of a $1 party favor military helmet. It is made out of super thin plastic, but fit my head (many other options were too small) and was crazy cheap.


 Step 4) Paint the helmet and crest. I used a gold paint from Menards that is used to paint frames/vases/etc to make them look fancy. The small sample jar was plenty for me to paint everything I needed (about $3). The helmet I used was shiny plastic, so it took a lot of thick paint to cover. Once I painted the helmet I also painted some details onto the gold paper (note: do not use too much paint or it will warp the paper).


