Showing posts with label Costumes. Show all posts

Tuesday, October 13, 2020

DIY Captain America Shield using Round Saucer Sled

For Halloween this year the family is going as some of the Avengers, so I chose Captain America.  The sled I used to make this shield was already used once as the shield for my Spartan Hoplite Costume so I needed to repaint it and make new handles.  The construction part of this was pretty simple and straightforward, but the painting was a bit of a nightmare; I hope you will learn from my mistakes!  I used only materials I already had at home other than the paint, so feel free to get creative with what you have available!

This isn't a movie-perfect recreation but it is a pretty easy process and makes a great halloween costume! You'll notice particularly the shield isn't actually even a perfect circle due to the hand holds in the sled, and the straps are functional (so you can hold the shield with one arm or behind your back) but do not resemble the movie straps.  Also it's plastic instead of vibranium so not useful in combat.   

Materials: 

-Round plastic 'saucer' style kids sled (28 inches across)

-8 D Ring style picture hanging hooks with screws and bolts (small!) to tie the straps

-Fake leather costume material (for hand straps) and leather string (for shoulder straps) 

-Metallic spray paint - silver, red, blue

-Plastic Primer **I Didn't Use This But I Should Have!! Please Learn From My Mistakes!**

-Spray sealant (I used Krylon Triple Thick Clear Glaze but that's just what I happened to have at home)

Supplies:

-Power drill

-cloth measuring tape (for measuring the curved surface of the shield and to use as a compass to draw circles)

-painters tape


Step one:

The first step was to drill the holes for the handles and a small hole in the very center of the shield for measuring and drawing circles.  Use a bit that corresponds to the screws you will use for the D ring hooks. 

There are 2 holes for each of the hand straps and 2 holes for each of the shoulder straps, so a total of 8 holes to drill for these, plus the 9th hole right in the center to help draw circles.  

I drilled my hand holes about 5.5 inches apart per strap, and the straps are about 10 inches from each other, roughly centered on the shield (note that the holes from the previous life of the shield (the larger ones in the photo) were offset from center, but for this build I made the straps centered).

The shoulder strap holes are about 15 inches apart per strap, and the straps are about 14 inches apart.  


Step 2:

Next I made sure that the screws for my D rings actually would fit, and secured them in place, bolt facing into the shield.

Step 3:

**STOP: This next step is a mistake! I should have sanded and used a PLASTIC PRIMER first, but this was a sled that had already been painted once so I was painting over old spray paint and foolishly thought the base layer of paint was well adhered to the plastic sled (see later steps for why this was so very incorrect)**

Next I spray painted the shield metallic silver on the front and back


Step 4:
Once the shield was silver (and the paint dry) I used the cloth measuring tape (with a nail in the end) to make the circles around the shield with a pencil.  The sled is about 28 inches wide (14 inch radius) so it divided nicely into a center circle of 5 inch radius, and then three outer circles each 3 inches wider (8, 11, 14 inch radii).  Or if you prefer, the center circle has a 10 inch diameter, the second circle has a 16 inch diameter, third is 22 inches, then the 28 inches of the shield itself).


Step 5:
Next I used painters tape to tape in the center circle and the middle of the three outer circles so I could paint the red layer. To get a roughly 'circular' pattern with linear tape you need to use lots and lots of little pieces.  Unfortunately since I didn't use a plastic primer this all went very badly about two steps from now.


Step 6: I painted the outside metallic red

Step 7: I removed the painter's tape and...


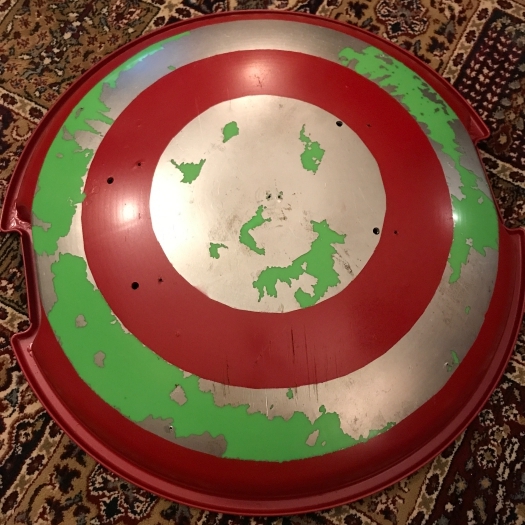
Oh nooooooooo! Since there was no plastic primer the paint was not well adhered to the sled, and the silver paint AND the underlying bronze paint from the previous project all came off.  Disaster! But the red paint looked great!

I tried a second round of very limited taping to see if I could get better results, but still had to do a LOT of hand touch-ups to get the colors back, and because it was done by hand the colors do not have the full metallic finish that you get when you actually spray the paint.  So PLEASE learn from my mistake and use a plastic primer to begin with and save yourself the headache!


Step...8? 
Finally having a good-enough red and silver base I attached the D rings to the screws and bolted them in place
Step 9:
Now it was time to paint the blue center of the shield.  I drew a star by hand by dividing the circumference of the shield into five roughly equal parts and connecting the dots.

Step 10:
Since taping was such a disaster I hand painted the blue onto the shield.  This does not look ANYWHERE as good as it would had I been able to tape off the star and actually spray the paint, so don't forget your plastic primer!


Step 11:
Now that I was happy with the paint I sprayed the shield with the clear sealant to (hopefully) keep it from flaking off (though, again, a plastic primer would also have been an important aspect in keeping the paint adhered to the plastic).  

Step 12: I cut the fake leather strips for the hand straps and the leather cord for the shoulder straps.  I had to play around with the lengths a bit to find what worked best.


And there you have it! Obviously this is not the world's most accurate recreation of the Captain America Shield but I'm very excited to use it for Halloween! And if there's an early blizzard I'm all set!


Friday, October 26, 2018

DIY Wizard Wands


For Halloween this year we are going as wizards from the Harry Potter universe, so of course we needed to create some wands! There are many descriptions online of using hot glue, dowels, and acrylic paint to make your own wands, and that's exactly what we did too.  I was surprised at how well it worked, and how nicely the glue took paint.  The glue works particularly well for organic shapes and patterns.


Supplies:
12 inch wooden dowels (from a craft store)
Sandpaper
Hot glue gun and many extra sticks of glue
Cheap acrylic kids paint
Glossy polyurethane

Steps:

The first step for me was sanding down one side of the dowel which would be the 'tip' of the wand.

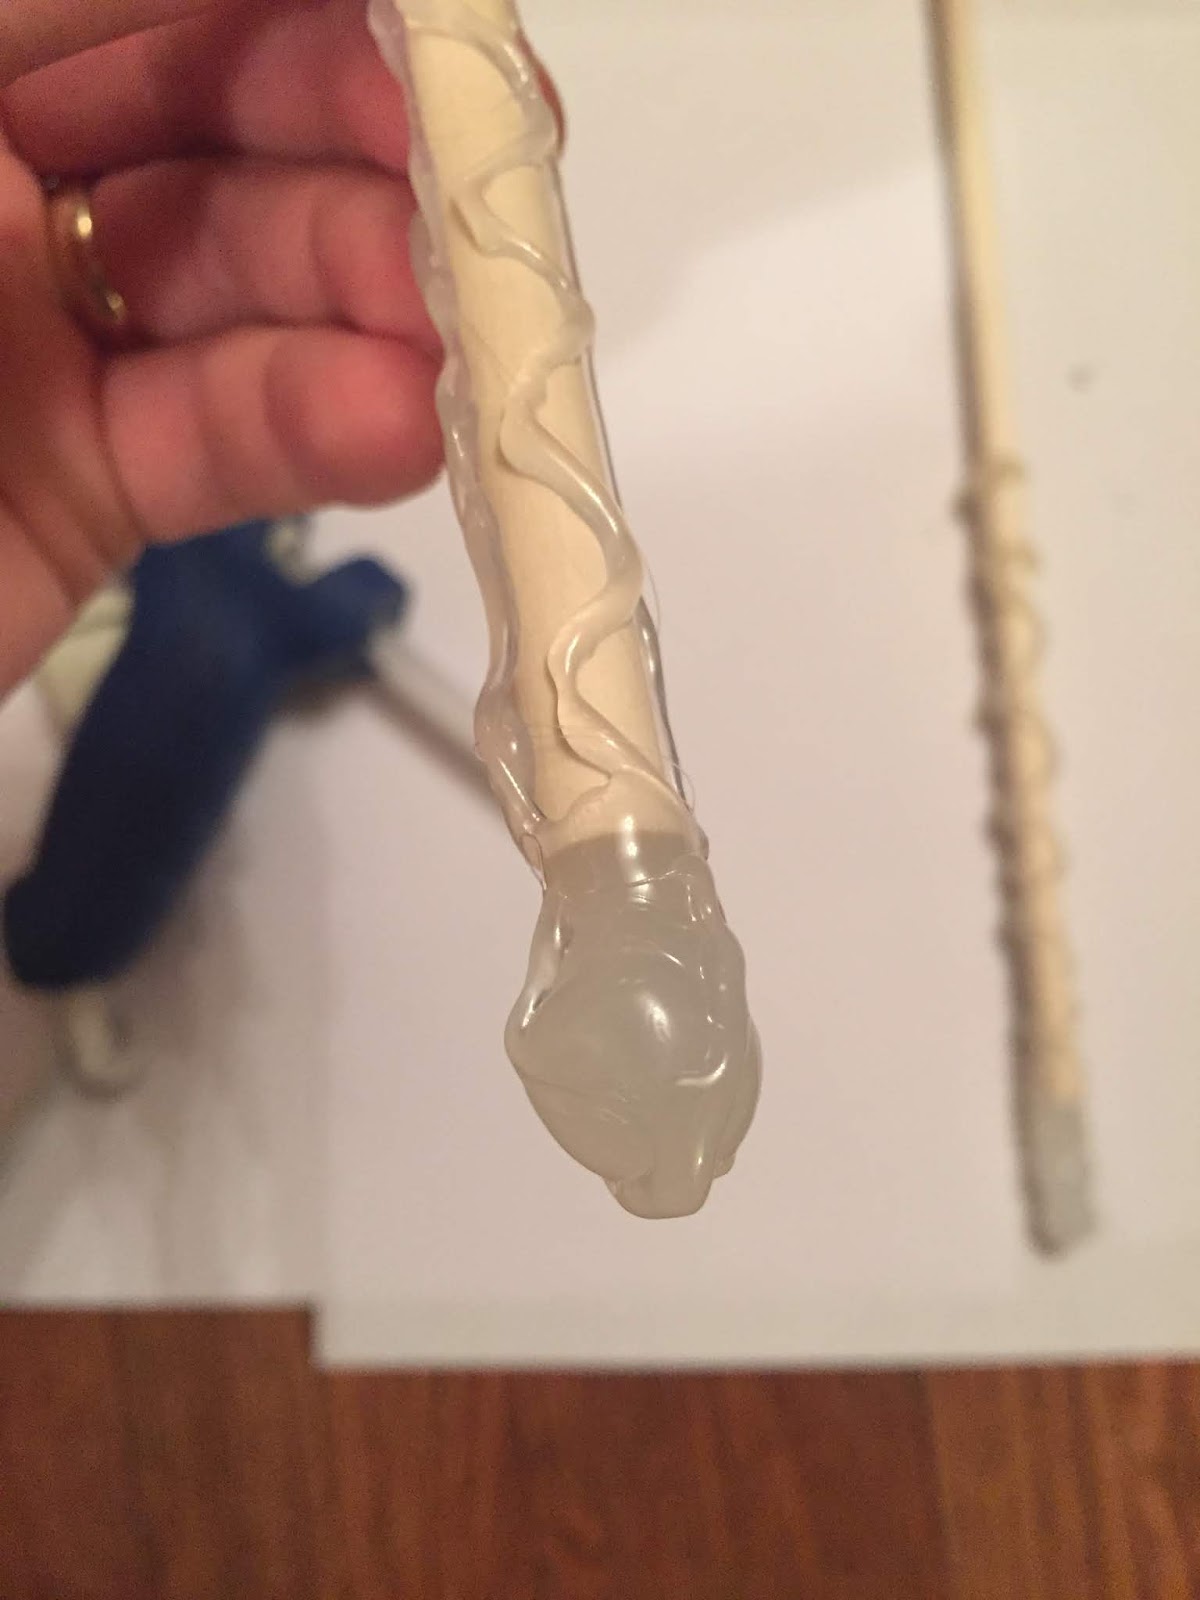
Next I added the hot glue.  I first made a sort of 'handle' for each wand where the thumb and forefinger will rest.  


Next I embellished the rest of the grip.

Last I added a 'butt' to the wand to increase the overall length of the grip. This is essentially just a giant glob of hot glue.  I added extra glue over the glob to make it more interesting.  This also served to add extra weight behind the 'handle' and make the handle the balance point of the wand.


I stopped adding glue to the end once the balance was right.


Now with the wands glued, it was time to paint them.

I used a black base coat, then successive layers of brown, from dark to light.  Each coat was thinner than the last, so that the deeper crevices remained darkest.  The final lightest brown I only painted onto the glue embellishment, and did two coats to increase the brightness.


I let the paint dry overnight.  The paint rubs off of the glue easily, so I coated the wands in a glossy polyurethane to seal them.  Overall I was quite happy with how these turned out, and the project overall was pretty simple.  It would also be easy to add further embellishments (tassels, beads, etc) to give them more variety.


Wednesday, October 29, 2014

DIY Richard Castle 'WRITER' Vest Costume


For all my costume posts, click here.  

This Halloween I'm going as Castle (from the show Castle), and to do so required making his 'WRITER' printed bullet-proof vest. 

Supplies:
-Dark Blue Vest
-Dark Blue Cloth (I used a light weight denim)
-White Screen-Printing ink and a paint brush
-Safety Pins

I cut out four pieces of fabric - two large ones for the writing and two smaller ones for fake chevrons. The larger pieces were 11.5 x 4 inches, and the smaller pieces are 9 x 3.5 inches. The smaller pieces are long so that they can wrap over the shoulders. 


I used 'Impact' font in Microsoft Word as it appeared to be the closest to what is used in the show.  I traced the text off my computer using a pencil.  Then I hand-painted the words using screen-printing ink.  I let them dry, then ironed the pieces before attaching them to the vest. I iron both sides for a few minutes, with the cloth under a piece of a paper bag. 
Click here for my full article on screen printing.

I safety-pinned the pieces onto the vest, and to each other to help keep them from flapping over. 


The rest of the costume consists of jeans and a long-sleeve blue button up shirt.  Going simple this year. 

Wednesday, October 24, 2012

Quick Last Minute Halloween Super Hero Shirt: Marvel's Wolverine

Need a last-minute idea for Halloween? So did I!  I was fresh out of ideas for Halloween after what has been a series of very fun and rather elaborate Halloween costumes.  This year I went simple and straight-forward: T-shirt + markers.

Supplies:
Solid print T-shirt
Permanent markers (or better yet, fabric markers)

Find a hero you like.  See how they make their costume.  Convert to a T-shirt.  Very simple, very satisfying.
I did Wolverine from Marvel's X-Men.  If you have to draw a lot, make sure you have a few markers available as you can run through them quickly.  Also, permanent marker, despite its name, does run if you wash the shirt.  Wash by hand to avoid too much running (and to keep other clothes from getting markered), or better yet do not wash the shirt until after Halloween.  


If you are looking for more elaborate costume ideas, see all the posts here

Friday, October 28, 2011

DIY Spartan Hoplite Costume

This year's Halloween costume is a re-vamp of my previous 300 costume.  This time I made a helmet, better spear, and armor (and managed to lose my cape somewhere...)  It's divided into different sections, so click the links below to check them out!  (The black long underwear and socks are recommended if you live somewhere that it might snow on Halloween).
Helmet

Shield  (Aspis, or Hoplon)

Spear (Dory)

Body Amour (Linothorax)

Greaves


For the original 300 costume, click here

For all costumes click here. For the Batman costume, click here.

Friday, October 21, 2011

DIY Spartan Hoplite Costume: How to make a faux-leather Linothorax, inspired by Gladiator costume, no sewing required!

For all the Hoplite Costume posts click here!

So I knew I needed some sort of chest armor for my hoplite costume, but had no idea where even to begin.  Then I saw one of Russel Crowe's costumes in Gladiator where he is wearing a leather chest plate that is made by multiple leather straps rather than one continuous piece.  This seemed plausible to make, as I have no idea how to forge an actual bronze chest plate or even a solid piece fake leather one.  So with that inspiration, I set to work.

I made this as easily as possible because I really can't sew.  The only things I did to make this was cutting the fabric and tying a few laces in knots.  It's that simple.  The design is a little complicated, but hopefully I will describe it adequately here for you! There are many diagrams I made which should make it easier.

The only supplies are a single piece of faux-leather (for costumes), a scissors, and a reel of faux-leather lace (for tying things together).

I started with 2 1/2 yards of a faux-leather halloween costume fabric (standard fabric roll wide, about 3 feet I think?).  The entire costume is made by cutting away at this.  There are two things to think about when starting out, which are how long the costume needs to be (knees to shoulders, over shoulders, and back down to knees) and how wide (the main body of the armor is as wide as your stomach/chest, the 'belt' goes around your back once and layers twice over your stomach).  That said, I made my basic 't' shaped design.  The main body of the armor is the long part, and the belt is the extensions out left and right on what will be the back side.  The ends (front and back) of the armor will eventually be free-hanging straps.  I measured my chest (measure to the base of your shoulder, not the ends of your shoulders) to determine how wide I needed to keep the fabric, and then my waist to see how long each side of the belt should stick out, then I started cutting.
Once I had my 't' shape, I made the central slit down the middle (where my head will go) so I could put the costume on and see how my measurements added up.  I determined one thing right away: do not measure out your full shoulders.  This ended up giving me a giant costume that had huge flaps around the stomach.  Rather, the chest piece needs to be as wide as your stomach/chest without shoulders so that it stays closer to your body.  I trimmed the armor accordingly and also shortened my belt pieces to the correct lengths, then continued on.
The armor is made up of 4 long straps that go front to back, and I wanted to re-create that but without actually using 4 individual pieces of fabric, so I cut from the shoulders down (front and back) to make the four straps, but did NOT continue them through the belt region,  This gave me the look of having 4 straps and the belt will later cover the part where I did not cut.  Keeping the entire piece solid like this means much less hassle later on and fewer knots to tie.
Now with 4 straps, I tried on the suit.  Unfortunately, having no specific head hole means that when I put the armor on, it all bends outwards.  To remedy this, I cut a diamond shape where my head needed to go (a triangle cut into both of the middle straps).  This worked much better.  To finish the chest/back, I added faux leather laces to tie together the straps.  I simply cut short slices into each strap adjacent to each other and used the lace to tie them together.  I made these ties on top of each shoulder and one in the center near my sternum.  I also made one long continuous strap that united the front and back pieces.  I made cuts in all 8 (4 front and back) straps and ran one long lace around the entire suit.  This lace goes UNDER my arms, and keeps the belly region together.

Now done with the top of the armor, I moved onto the belt.  The belt is fairly simple: The two flaps coming off the back of the armor are wrapped around to the front and tied down (using the same technique as the shoulder ties, just make two slits in the belt piece and also the piece you are tying it into and run the lace through).  Once you've tied down the first belt piece in front, bring the second belt piece from the back have it overlap the first, then tie it down as well.  I made the second belt piece into 3 straps by cutting it long-wise (and made one tie for each strap) and also made each end into a triangle.  I thought it looked neater.  The photos show the first belt tied in (left) and the second belt tied in (right).   


Finally, with chest and belt finished, it was time to finish the bottom pieces.  I didn't do a lot for these, just cut them into 4 straps (mirroring the chest piece) and made each end in a triangle. 
All done!

For all the Hoplite Costume articles click here!