|
| Hogsmeade Christmas Village |
I've had a very long-term goal of one day making a Christmas Village, and recently was inspired by a trip to Harry Potter World at Universal Studios to try to make a Hogsmeade of my own. I looked around online to see if you could buy a pre-made Christmas or Winter Hogsmeade or other such thing, but the closest I could find was the Harry Potter Village from Department 56 which is notably Not wintry (
https://department56.com/collections/harry-potter-village).
 |
| Hogsmeade Christmas Village Illuminated at Night |
So I went to a local thrift store and procured three generic Christmas Village houses and set to work re-painting them. My primary supplies were cheap acrylic paint from a hobby store and equally cheap kids paint brushes, along with a solid amount of patience and time. I've broken down the basic steps for each building below, hopefully with enough tips to help you make your own charming Christmas Hogsmeade.
 |
| Honeydukes, The Three Broomsticks, and Flourish and Blotts |
 |
| Honeydukes, Three Broomsticks, Flourish and Blotts |
Painting techniques - I used two 'techniques' while painting which I reference below:
Technique 1) The first is a 'wash' effect. This means diluting the paint in a large amount of water until you have a very runny paint, or really more like a tinted water. This is used to darken crevices and make shadows. This is much easier than the 'real' way to make depth in painting, which would be to paint a very dark layer, then a slightly less dark layer, then a slightly more less dark layer, etc.
Technique 2) The second technique is 'dry brushing.' This refers to putting paint on a brush, then wiping most of the paint off on a paper towel (or wherever) so that very little paint remains. You then lightly brush the paintbrush over the area you wish to highlight, and only the parts sticking out the farthest will be painted. This is used for highlights; lighter colors put on as accents (the opposite of a shadow).
Building 1: The Three Broomsticks
This is the original building I re-painted. I kept most of the patterns, just changed the colors. I actually didn't re-paint the rock wall; just added a black wash to make it pop.
Step one: paint solid colors over the roof (deep grey), the woodwork/stucco (light taupe), and doors/windows (burnt umber).
I also painted the woodwork burnt umber.
Once all my base colors were down, I did a black wash. As noted above, this means I took water, added a hint of black paint, then 'washed' the building in that mixture so it would sneak into all the crevices and cracks. You can especially see in the stones on the wall how this creates a strong shadow.
Once the black wash dried (give it plenty of time!), I dry brushed a light grey onto the roof to accent the tiles. The light grey was made by simply mixing white and the deep grey I had already used for the roof.
Here is the almost completed building. I dry brushed the woodwork with a lighter brown mixed with white, to help the woodgrains stick out. The white snow on the roof I had to paint because I got paint on it during painting. The original snow was a sort of warm off-white, and I changed it to a straight white. It took quite a few coats of paint to get a solid white color, probably because I used such cheap acrylic paints.

Here you can see how I made the broomsticks for the Three Broomsticks logo. I started with small matchstick pieces, and cut them quite short. I then took thread and wound it into a ball, then cut it on either end to make a large volume of short little strands. I tied these around the base of the match stick.

I painted the broomsticks dark brown, then hot glued them together to make a triangle. Once the glue was dry I highlighted the 'straw' on the ends with a lighter brown paint.
To attach the logo, I cut a paperclip and hot glued it to the roof of the building, then painted it deep grey to match the roof.
 |
| The Three Broomsticks Christmas Village |
Here is the Three Broomsticks in all its glory!
Building Two: Flourish and Blotts
I know technically this shop is in Diagon Alley, not Hogsmeade, but I really like it and thought it would be a nice shop for a Christmas Village, so I'm telling myself they were able to expand to a second location.
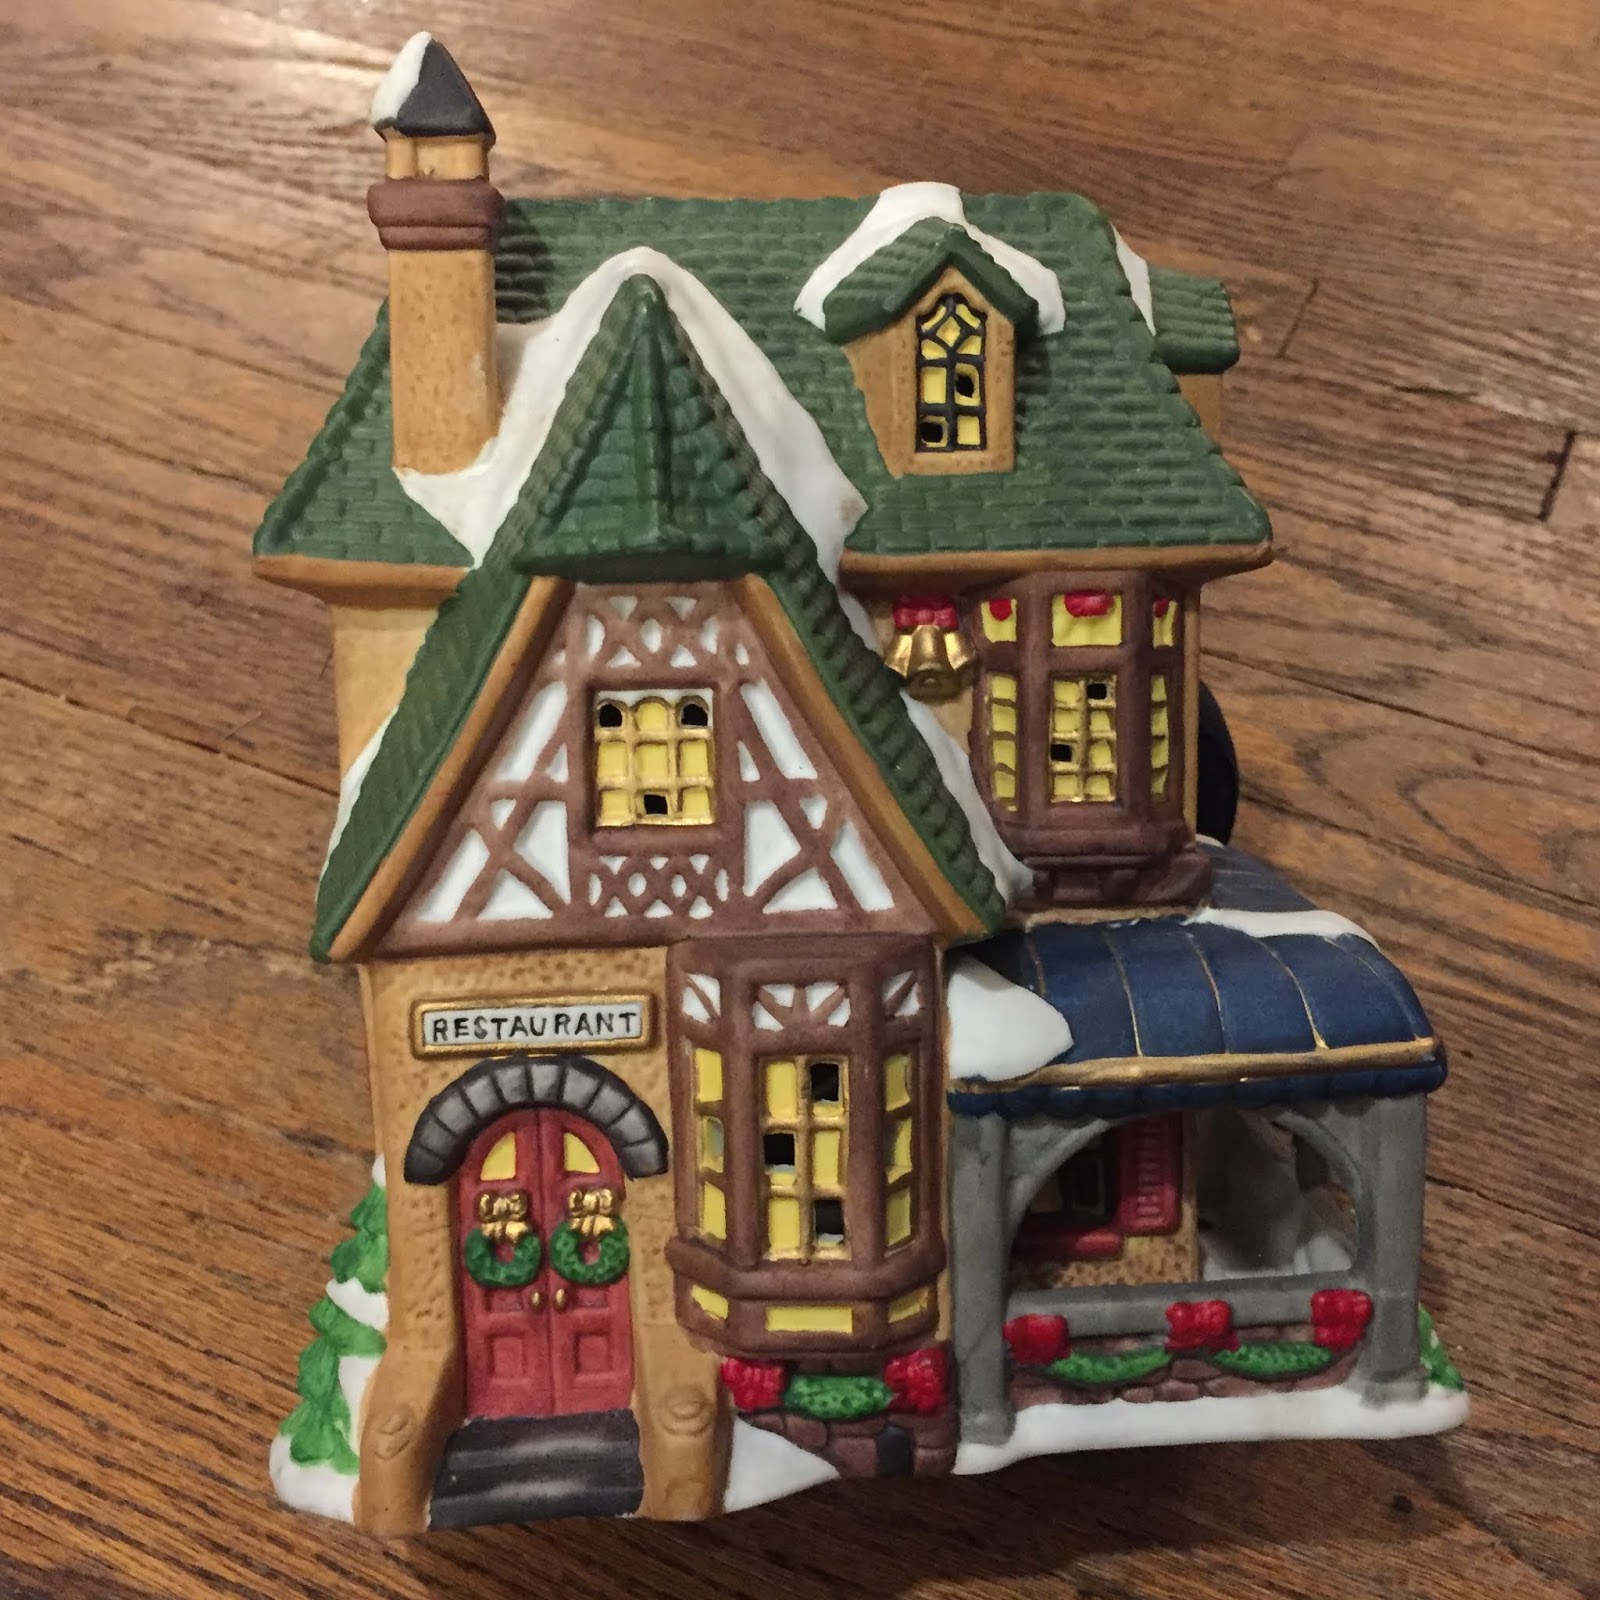
Here's the original building.
I used mostly the same colors for this building as I had for the Three Broomsticks; Deep Grey for the roof, Light Taupe for the stucco, Burnt Umber for the woodwork. But now I also have Evergreen for the trees and garlands and Tan for the painted stone walls.
The logo proved to be a little tricky to replace. I tried to scrape the logo off, but it wouldn't budge, and I worried I might shatter the whole building. So instead I used some spackle meant for filling nail holes in walls, and covered it to make a tiny dome. Plaster of paris would have been a better bet, but I didn't have any handy. I ended up painting it numerous times (eventually gold) and the paint helped smooth out the finish.
(you can see the plaster of paris version in my later Madam Puddifoot's here)
I changed my mind and decided to paint the windows Santa Red instead of brown, and did a first coat of white paint on the window panes.
Here you can see the black wash, which really helps the stone walls pop.
Here you can see another wash, this time a yellow wash in the window panes. I initially did an orange wash but it was too dark orange, so I painted them white again and tried the yellow wash. Even the yellow wash was a bit more intense than I intended, so I did a very light white coat in the center of each pane afterward, to keep the edges yellow but make the center brighter. My goal was to make the windows appear to have a gentle glow to them.
Almost done! Here you can see the final effect of the glowing windows, and the gold logo. I also made the awnings dark blue. The garlands and trees are Evergreen color with a black wash and Kelly Green drybrush to highlight. The bows are Santa Red mixed with black, then straight Santa Red for highlight.
 |
| Flourish and Blotts Christmas Village |
Here's the final product! My partner made the logo with a fine point black acrylic paint pen.
Building Three: Honeydukes
The painting for Honeydukes was much the same as the others except I used a variety of color washes to give the windows a stained-glass appearance. The windows were much too small to try to paint tiny candy in them, so I figured the colored glass would help convey the colorfulness inside.
Here's the original building. There's a lot going on.
Some of the starting bits: a Pink door and window shades, dark green for the wood trim and awning, burnt umber for the supporting wood structures, deep grey roof, etc. The Honeydukes from the movies has a green/pink color scheme which I wanted to replicate. There are actually windows and window shades under that awning which were very much not fun to paint.
Here I started to paint in the windows and stucco behind the wooden ornamentation. This part involved a lot of painting and then touching up and then painting again etc
Here you can see the washes of color for the windows. This part was a lot of fun.
The logo on this building was imprinted, so the wall filler actually worked well to smooth it out so I could paint a new label onto the building.
At this point the building is almost finished. I highlighted the roof, beams, doorway, and window shades by drybrushing.
 |
| Honeydukes Christmas Village |
And here it is! The final building of the project. This one was definitely the most detailed and difficult, but also my favorite to have finished!
I hope you have found this tutorial helpful; Merry Christmas!