

Tuesday, April 1, 2014
Degas' Ballerina

Thursday, October 31, 2013
DIY Articulated Dinosaur Leg Fossil from PVC Pipe, Aluminum Foil, and Paper-Mache

Supplies: PVC pipe (3/4 inch and 1/2 inch), PVC pipe insulation (for the 3/4 inch), aluminum foil, duct tape, white glue, thin wire, coat hanger (metal, used as the main support to keep the leg bent), rope, paint, newspaper (for paper-mache)
I used photos I found online to determine how the leg should look, but I highly recommend you go to your nearest Science Museum and take 360 degree photos of a dinosaur leg for best results!


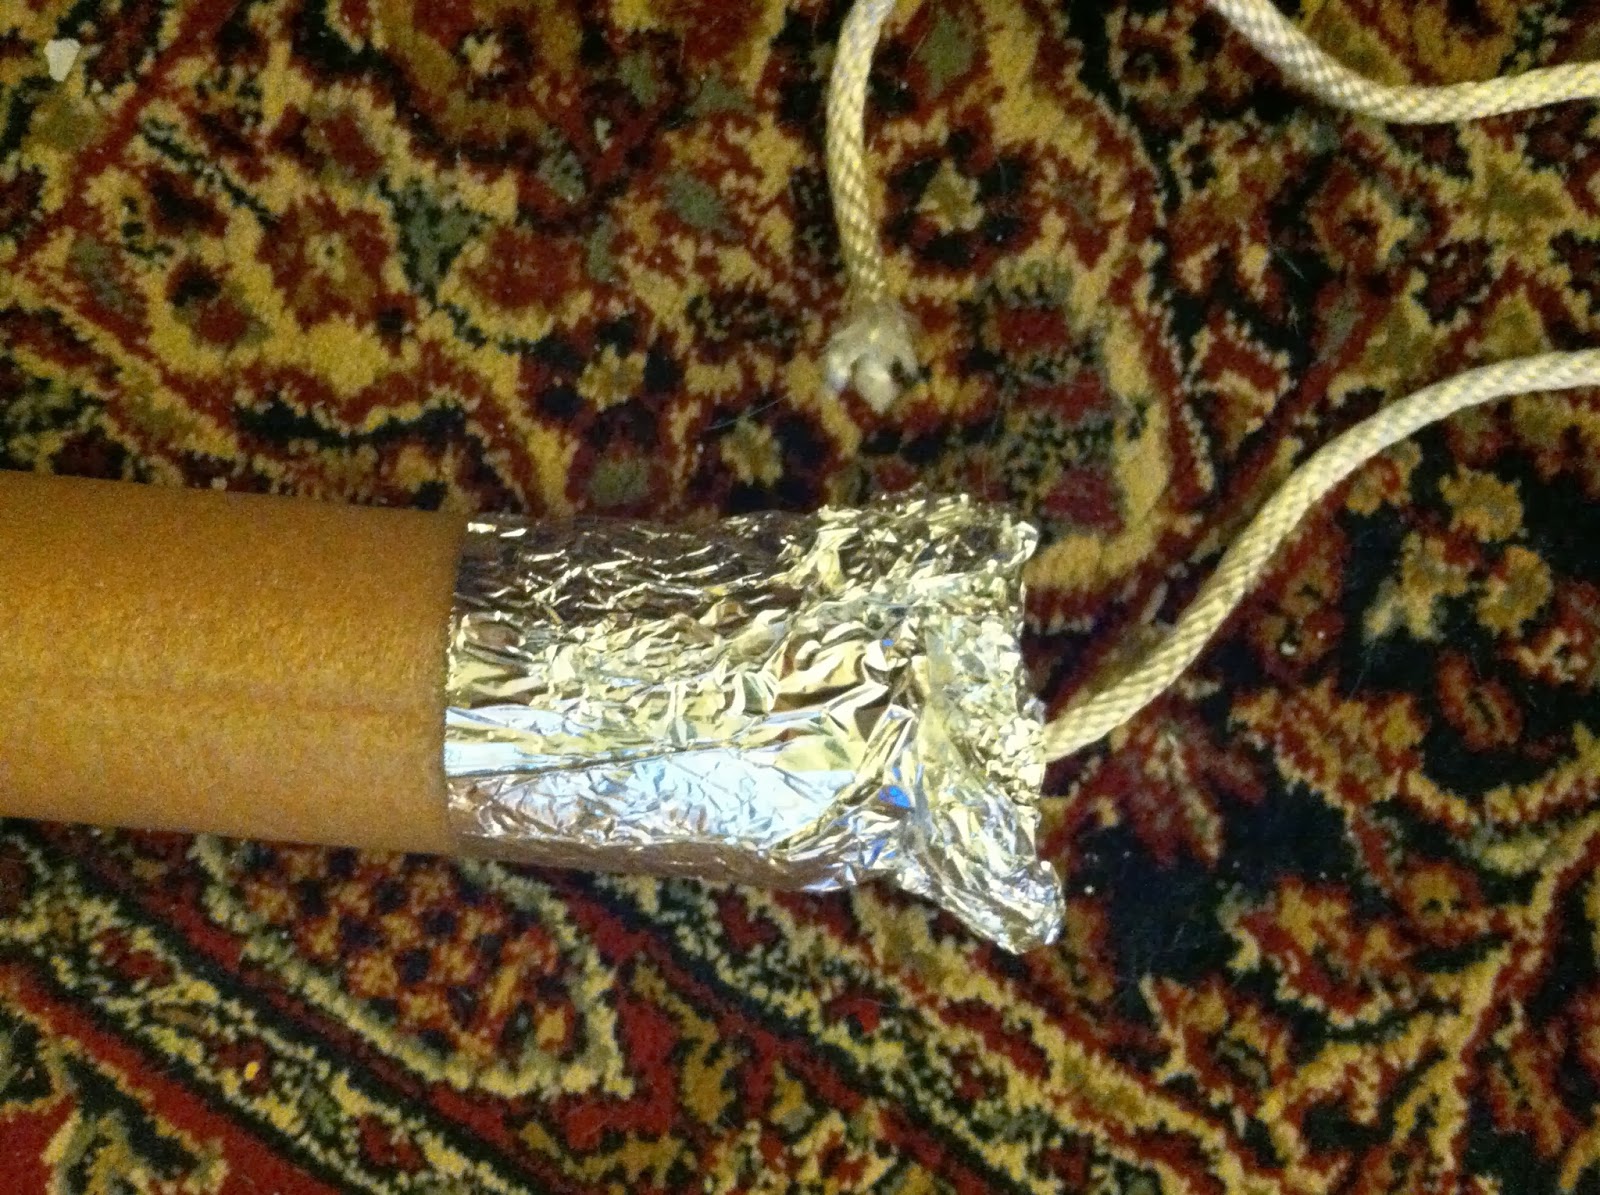 Here I covered the top bone (femur) in insulation foam to give it extra bulk, and started forming the end of the bone by adding aluminum foil.


Since the rope that connected all the bones only ran through one toe, I used wire to make a frame for the rest of the toes to sit in. The wire was bent at the end of each toe (or aluminum foil added) to prevent them from slipping off.


Once I added aluminum foil to the foot I realized that some of the dinosaurs I was looking at had a 4th toe on their feet. This 4th digit is usually pretty small, so I didn't want to use PVC pipe, so I just made the 4th toe out of aluminum foil. I also added claws on the ends of each toe with aluminum foil.


Here you can see the final fully prepped leg before I started the paper-mache. For paper-mache I use a roughly 50/50 mix of warm water and white glue. I did a few layers on the larger bones, but the small toe bones mostly just got one layer each. Make sure you don't cover the ends of the PVC pipes with the paper-mache (you will need them open so that you can run a wire through them later). Let the paper-mache dry overnight before painting. ideally.


Painting the leg was very simple (though first I tried a variety of other options that did not work). I used cheap acrylic kids paints for the whole thing. The paint scheme is:
1) Solid layer of brown paint. 2) Highlights using a mix of about 1/3 brown paint in 2/3 white paint.
The highlights are done by 'dry-brushing,' which is where you take the brush, dip it in paint, wipe off most of the paint, and then lightly run the brush along the surface of the bones so that only the bits that stick out the farthest will be painted.


To further highlight the separation between bones, I did NOT dry-brushed the lighter brown color into the spaces where the bones meet (seen best in the foot, where I dry brushed along the original 3 pieces of PVC pipe but not the area between them that was covered by the paper-mache)

After painting, all that was left to do was mount the leg properly. The rope that runs through the entire leg was helpful in keeping the bones next to each other, but does not provide any rigidity to keep them in place. To fix this, I took an old clothes hanger, straightened it out, ran it through the bones, and then bent it at each joint to make the appropriate pose. I also poured some white glue into the pipes and at the points where the separate bone sections touch to help keep them in place. The foot also needed a small piece of a thinner wire on the outside to keep in in the correct position (which I then painted brown so it would be more subtle). Because of the small wire in the toes, they can be individually moved around.

**Embarrassingly, the final mounted version has an error! the middle bones (tibia/fibula) are backwards! The photos showing the pre-paper-mache and paper-mache versions have them correctly positioned.**
Sunday, September 1, 2013
Plant Propagation: Papyrus


Propagating Papyrus plants is rather entertaining as they grow upside down! The plant shown here is Cyperus alternifolius (umbrella papyrus) I believe. I also did this same propagation with a Cyperus papyrus but it did not grow quite as well, perhaps due to higher light requirements.

 Propagating this plant is super easy:
Step one: Cut off a stem of the plant.
Step two: Place upside down in water.
All done! Keep the water level relatively consistent, and place in the sunniest place you can find, either a south window or outside is best. I used a western window and had some success though the plant did much better once it got outside.


For more plant propagation posts, click here
**Update: It's now been about a year total since I originally rooted the papyrus, and it's still doing great! survived and thrived in a western window all winter.
Wednesday, August 28, 2013
Mini Monet: The Summer Poppy Field


My first decently sized painting (11x14). Still working on technique; I need to learn how to use larger brush strokes to get the effect I'm really looking for. A picture taken during the process shows how it evolved as I worked on it. Original painting here.
Friday, August 23, 2013
More Doodles in 3D
Another version of forced perspective doodling and creating 3D effects. This time with actual 3D!
For my other 3D doodles, click here

For my other 3D doodles, click here

Monday, July 29, 2013

Monday, June 10, 2013

Tuesday, May 28, 2013
Mini Monet: The Japanese Bridge

Monday, May 27, 2013


Saturday, May 4, 2013
Yellow-rumped Warbler (Myrtle Warbler)

For more song bird drawings, click here
For all my song bird art, click here

Subscribe to:
Posts (Atom)