Saturday, August 15, 2015

DIY: Framed Cork Board Jewelry Organizer with Burlap


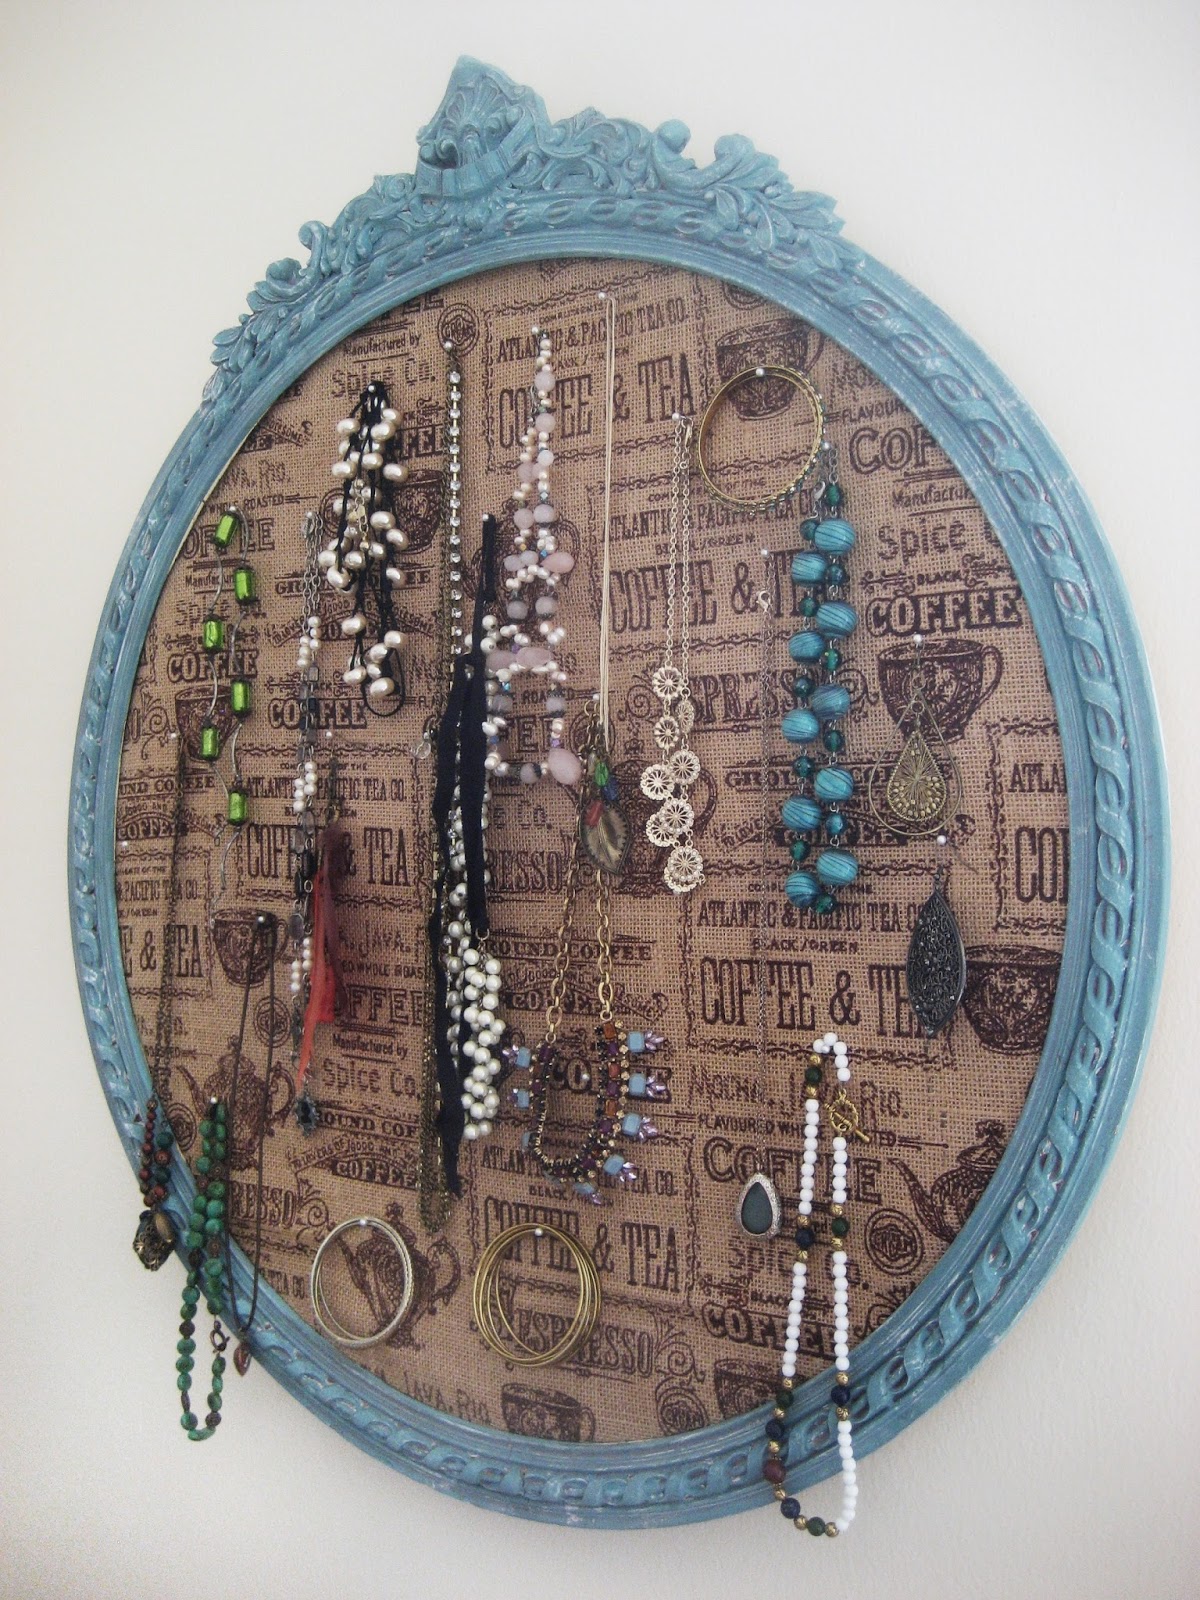
I wanted to make my wife a jewelry box that was extremely high capacity and didn't take up too much space.  My wife found a great old frame at an antique store and suggested we convert it into a jewelry board. I recently managed to get around to it, and we've been quite pleased with the result!
For other jewelry boxes, check out here and here

Supplies:
-Empty Frame
-Foam Presentation Board
-Cork Board Roll
-Burlap Cloth
-White Glue
-Staples
-Nails (for keeping board in frame)
-Pins (for hanging jewelry)
-Paint (for painting frame if needed)


The Frame:  The frame we bought is about two feet across, and was covered in chipping paint.  I really wanted to accent the design of the frame, so I painted it with a blue/green base coat, white highlights, and a coffee brown shadow.

First the base coat: The original frame color was white, so it was pretty easy to get a nice strong color base.
Next I dry-brushed on white to accent the carving.  Dry-brushing is an easy technique where you lightly dip the paint brush in paint, then essentially take all the paint back off by brushing the paint onto a paper towel or other surface.  With just a hint of paint left on the brush you lightly brush over the object and only the highest points will become painted.  


Finally I did a wash with a coffee brown.  To make a wash, get a small container of water, then put a small amount of paint in the water.  I think I usually end up with about a 2:1 or 3:1 water to paint ratio.  Use a brush to transfer the watery paint onto your frame.  The paint will flow down into the crevices, giving a nice shadow.  Careful not to transfer too much liquid or it will take forever to dry.  


The Board: 
From outside-in it goes: Burlap, Cork Board, Foam Board.  The Cork Board and Foam Board are glued together, and then the Burlap is wrapped around them and stapled down.  This whole package is then put into the frame and tightened in using nails or staples. 

First I cut out the foam board and cork roll to fit the frame.

We had a circular frame, so cutting the foam and cork was a bit trickier than it would be with a rectangle or square.  To make the circle I used a string and pen, as shown below.  The string is 1/2 the diameter of the frame, and it is pinned to the center of the board.

It turned out our board was not wide enough to make the complete circle, so I needed to take the ends of the board and cut the rest of the circle out.
The cork board was pretty delicate, and crumbled easily, but I managed to get a nice circle worth cut out.  I then used white glue to adhere the cork to the foam board. I set some books on top of the cork board while the glue dried to prevent it from rolling up. 


Now that I had my pieces cut out, I put them into the frame to make sure I'd actually measured it all correctly.

The boards fit pretty snugly, so it was time to add the burlap.  Originally I was going to use a plain burlap, but the place where I bought it had a printed burlap on sale that seemed very appropriate for my wife.

I placed the burlap over the cork board side of the circle, and then placed this 3-layer combo back inside the frame to make sure there was room enough for the burlap cover.


Now that I knew the covered board would fit in the frame, I stapled the burlap tight against the board.  It is important to make sure the burlap on the front of the board is taut and not hanging loose.  This took quite a few staples to get the burlap around a circular board (another reason it is much easier to be using a rectangular or square frame!).  When I was finished I placed it back into the frame.


To secure the board into the frame I put nails into the frame and bent them down into the board. If you have a staple gun you could probably as easily staple the board into the frame or any of a number of different options (duct tape works well too).


Finally it was time to hang the board on the wall and add pins to hang jewelry.  I used pearl-headed pins because they fit with the overall look.

Finally it was done!  The frame is two feet wide, so the final board is able to hold a TON of jewelry. 

Friday, July 31, 2015

More Silly Doodles

Silly art is often my favorite art.  Two forced perspective doodles I made recently.


A combination of a series of post-it notes fading away into the background and then one that is actually closer to the camera.  


The desk ship pops up nicely at the correct angle but is oddly skewed when viewed straight on.

Sunday, July 19, 2015

Dessa

An ink drawing I did of a friend's most excellent dog recently.  I also made a watercolor over ink version.


Saturday, June 6, 2015

Sunday, May 31, 2015

Conch Shell and Bird of Paradise Coloring Blanks

 Tropical themed coloring! Bird of Paradise flower and a Conch shell. 


Tuesday, May 26, 2015

Dinosaur Serving Plate

This is not actually my own project; my awesome friend Ashley made this for us as a wedding gift and gave me permission to share it with the world!  Surely a must-have for any dinosaur themed gala or event. 

The basic idea is very simple: Take a dinosaur toy (or any tall item, really), cut the top off, glue a serving platter onto the base, then glue the top back onto the tray.  They used an epoxy glue to make sure it has a solid attachment. 

The hardest part is getting a level cut so that the tray sits flat.  On the plus side, if your initial cut is a little off you can easily trim it up to make it flatter.  In this case, the arms of the dinosaur conveniently were at a level that they also support the plate.   

The other tricky aspect is balancing the plate.  The toy dinosaur makes a nice tripod with its feet and tail to support weight.  The majority of the plate sits over this tripod (behind the head) so that it doesn't tip forward when weight is added to the plate.  You want the center of your plate over the center of support of the toy, not the part you cut. 

For the painting/finish, make sure to use something food safe (if you're going to be serving food on it) or keep food away from the head! Paint/finish the head before attaching it to the plate to make sure you don't get your paint/finish on the plate itself.  You're ready to party!

I call him Alfred, the Dinosaur Butler.  


Sunday, April 19, 2015

Chelonian Sketches

Some ink sketches of common Minnesotan turtles.  Clockwise from the top: Snapping, Painted, Soft-shelled.

Sunday, April 12, 2015

Balsa wood Meeples

For a Christmas gift this past year I made some balsa wood meeples ('animeeples' to be specific).  These are extra pieces to be used with games such as Agricola, Settlers of Catan, etc that use small wooden tokens.  I made a herd of llamas, a family of elephants, and a quartet (?) of giraffes. 

I made them out of balsa wood because it is easy to shape and doesn't require owning a jigsaw.


At first I tried to directly carve the entire meeples.  This proved to be a slow and tedious process that unfailingly ended with me snapping a piece off the meeple (usually a neck or foot) because the balsa wood cracks easily.


The much easier way, I discovered, is to cut out just a very vague shape out of the balsa wood and then use sand paper to actually create all the fine details (indeed, the squarish thing above is all the more detail I cut with the Xacto knife!).  I used a heavier grit sandpaper for the initial shaping, then moved to finer grit for the finishing touches.  Make sure they can stand up on their own before you paint them!


The meeples were given two coats of paint to get a nice solid color, and then let dry.

I used a semi-gloss polyurethane to give them a good shine and also to make them a bit more durable.  I ended up doing 2-3 coats of polyurethane on the meeples (careful, too thick of polyurethane will start making them look yellow).


Green-Cheeked Conure

Green-Cheeked Conure, Water Color over Ink


Sunday, March 22, 2015

DIY (Frog) Drawing on Onesies

My friend recently had a Onesie drawing party and I had a chance to try out some Crayola fabric markers!


Things I learned:

1) Put cardboard inside the onesie or the markers will bleed through to the other side!
2) You need to put a lot of ink into the drawing or it will fade very rapidly in the wash (even to the point of disappearing completely after a single wash!). I drew all the 'lines' as a series of dots to really make them dark.  This was also helpful because the fabric stretches under the marker if you try to draw a line, so the dot method keeps things in place
3) Iron the drawing before washing (set to 'cotton,' iron on the reverse side of the drawing) to help it stay permanent
4) Wash separately (the Crayola website says for at least 3 washes) so that you don't dye other clothing!
5) Buy enough markers! You can't make strong colors if you run out of ink!
6) Stencils are another option if you find some patterns you like!

This is a red-eyed tree frog onesie I made, complete with fake trademark.  I drew a black outline of the frog first, and then added in color.  The markers bled together a little, so there are some areas near the black lines where the color gets darker, but for the most part they worked well.  You can see in the blue areas that I was running low on ink so I couldn't get the color quite as strong as the green and orange. 

This is the Crayola site regarding their fabric markers:
http://www.crayola.com/crafts/shirt-stylz-craft/

There are other fabric marker brands out there, I just haven't had a chance to use them yet! I've drawn on shirts using permanent markers before (definitely wash separately the first few times!) and they do fade after a number of washes, so I'm hoping that using real fabric markers will mean greater longevity!