Saturday, August 15, 2015
Da Vinci's Degas
I was inspired by seeing Da Vinci's Codex Leicester at the Minneapolis Institute of Art this summer to do a work loosely based off the Vitruvian Man. My wife is a big fan of Degas' ballerinas, so I decided to try to blend the two. The final piece is 8x10, oil pastel over pencil. I have included a step by step look at how it developed.
DIY: Framed Cork Board Jewelry Organizer with Burlap
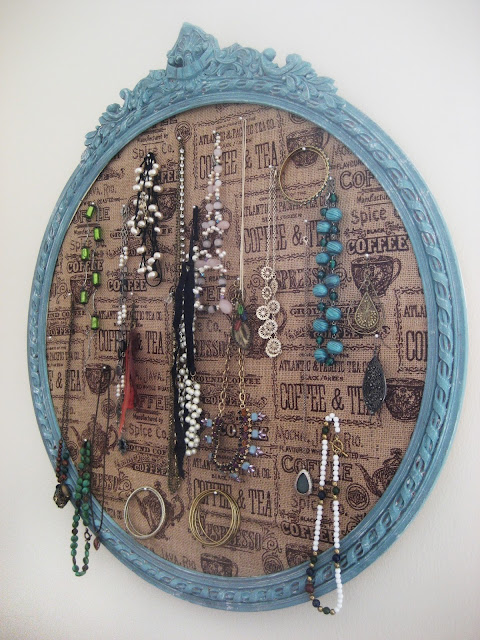
I wanted to make my wife a jewelry box that was extremely high capacity and didn't take up too much space. My wife found a great old frame at an antique store and suggested we convert it into a jewelry board. I recently managed to get around to it, and we've been quite pleased with the result!
For other jewelry boxes, check out here and here
Supplies:
-Empty Frame
-Foam Presentation Board
-Cork Board Roll
-Burlap Cloth
-White Glue
-Staples
-Nails (for keeping board in frame)
-Pins (for hanging jewelry)
-Paint (for painting frame if needed)
The Frame: The frame we bought is about two feet across, and was covered in chipping paint. I really wanted to accent the design of the frame, so I painted it with a blue/green base coat, white highlights, and a coffee brown shadow.
First the base coat: The original frame color was white, so it was pretty easy to get a nice strong color base.
Next I dry-brushed on white to accent the carving. Dry-brushing is an easy technique where you lightly dip the paint brush in paint, then essentially take all the paint back off by brushing the paint onto a paper towel or other surface. With just a hint of paint left on the brush you lightly brush over the object and only the highest points will become painted.
Finally I did a wash with a coffee brown. To make a wash, get a small container of water, then put a small amount of paint in the water. I think I usually end up with about a 2:1 or 3:1 water to paint ratio. Use a brush to transfer the watery paint onto your frame. The paint will flow down into the crevices, giving a nice shadow. Careful not to transfer too much liquid or it will take forever to dry.
The Board:
From outside-in it goes: Burlap, Cork Board, Foam Board. The Cork Board and Foam Board are glued together, and then the Burlap is wrapped around them and stapled down. This whole package is then put into the frame and tightened in using nails or staples.
First I cut out the foam board and cork roll to fit the frame.
We had a circular frame, so cutting the foam and cork was a bit trickier than it would be with a rectangle or square. To make the circle I used a string and pen, as shown below. The string is 1/2 the diameter of the frame, and it is pinned to the center of the board.
It turned out our board was not wide enough to make the complete circle, so I needed to take the ends of the board and cut the rest of the circle out.
The cork board was pretty delicate, and crumbled easily, but I managed to get a nice circle worth cut out. I then used white glue to adhere the cork to the foam board. I set some books on top of the cork board while the glue dried to prevent it from rolling up.
Now that I had my pieces cut out, I put them into the frame to make sure I'd actually measured it all correctly.
The boards fit pretty snugly, so it was time to add the burlap. Originally I was going to use a plain burlap, but the place where I bought it had a printed burlap on sale that seemed very appropriate for my wife.
I placed the burlap over the cork board side of the circle, and then placed this 3-layer combo back inside the frame to make sure there was room enough for the burlap cover.
Now that I knew the covered board would fit in the frame, I stapled the burlap tight against the board. It is important to make sure the burlap on the front of the board is taut and not hanging loose. This took quite a few staples to get the burlap around a circular board (another reason it is much easier to be using a rectangular or square frame!). When I was finished I placed it back into the frame.
To secure the board into the frame I put nails into the frame and bent them down into the board. If you have a staple gun you could probably as easily staple the board into the frame or any of a number of different options (duct tape works well too).
Finally it was time to hang the board on the wall and add pins to hang jewelry. I used pearl-headed pins because they fit with the overall look.
Finally it was done! The frame is two feet wide, so the final board is able to hold a TON of jewelry.
Subscribe to:
Comments (Atom)


