

Friday, December 30, 2011
Wednesday, December 28, 2011


Sunday, December 25, 2011

Saturday, December 10, 2011

Wednesday, December 7, 2011
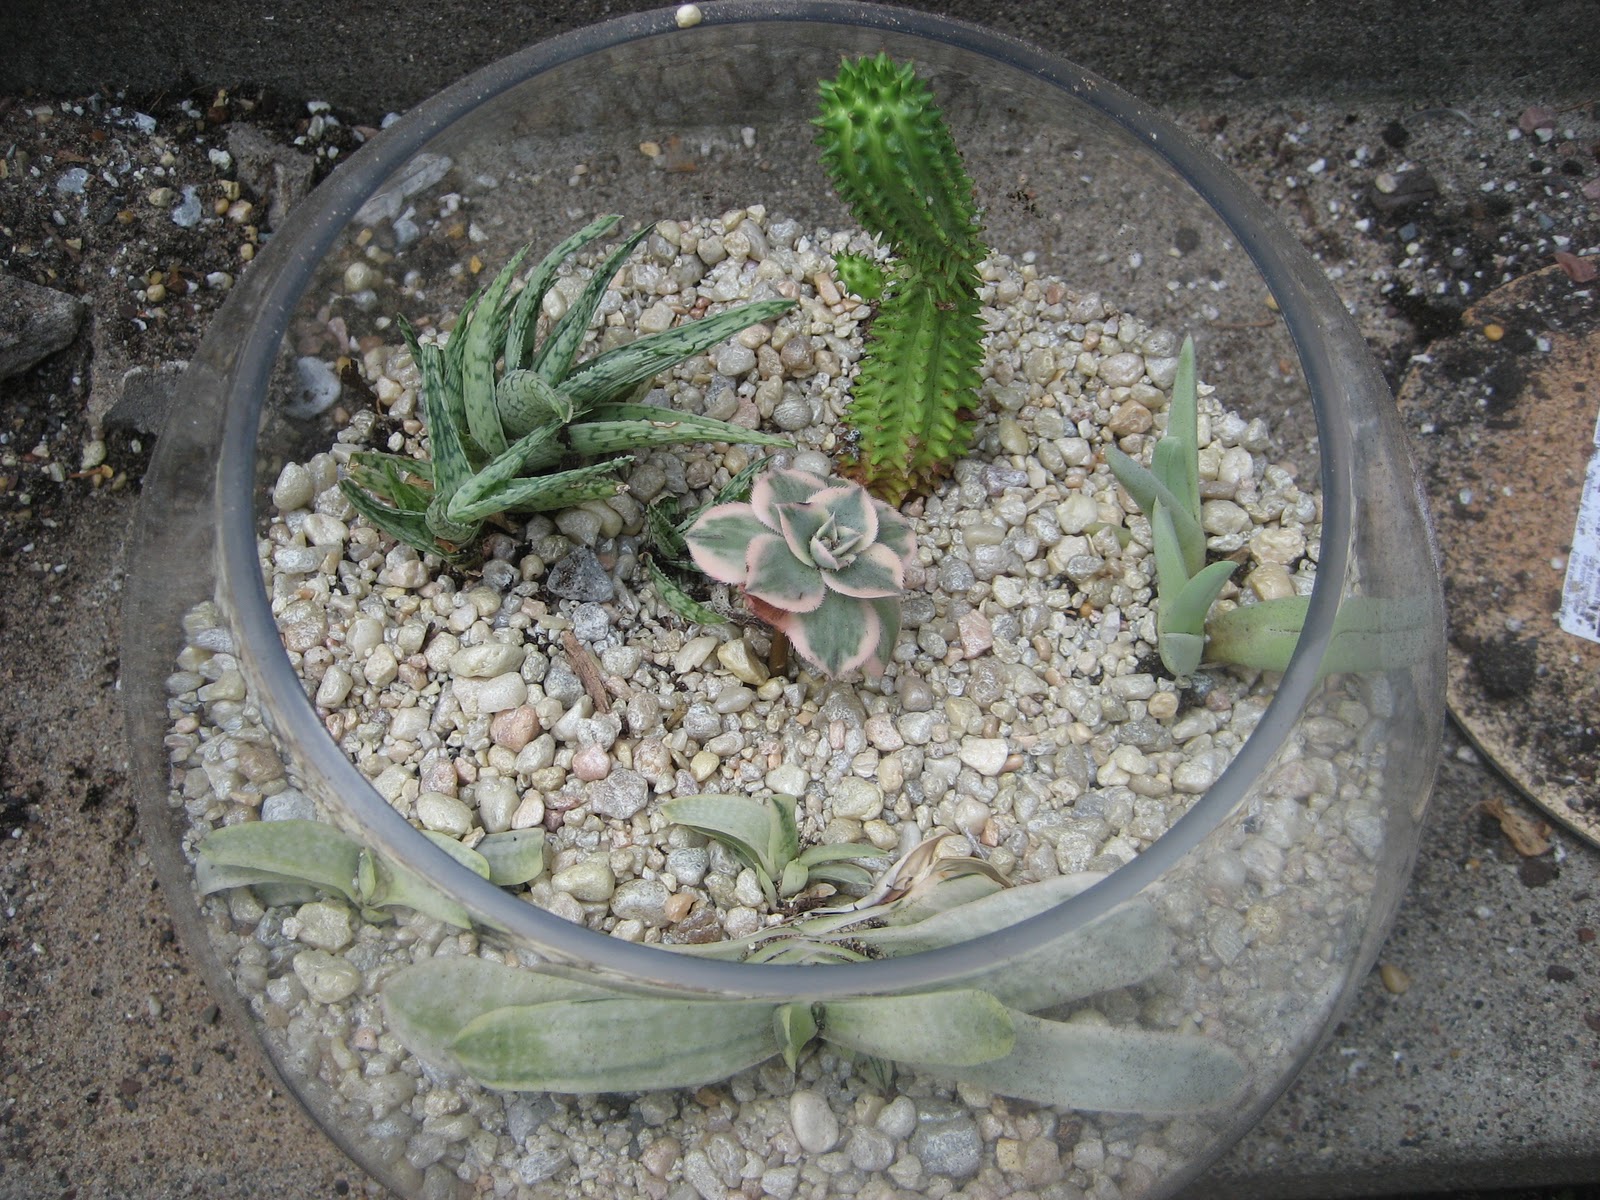
DIY Succulent Terrarium

For instructions on a smaller succulent terrarium, click here
 Supplies: succulents (a cactus would work as well), dirt, sand, rocks, large glass bowl/dish/terrarium. Also nice: gravel/rocks for top layer.
 Plant selection: I just used all the succulents I had in stray pots that needed a new home. This was not ideal (one of them it turned out was terrible for living in a terrarium and died), but consistent with my general theory of succulents which is: Buy a bunch and see what happens! When you buy your succulents you can ask someone at the garden store which ones do very poorly with humidity (don't get these ones for a terrarium), but I enjoy succulent roulette personally.
Step 1: put large rocks in base of terrarium. This allows excess water to get out of the soil and not rot your plants, at least in theory.
Step 2: put smaller rocks around the large rocks. Still working on irrigation here.


Step 3: put sand over smaller rocks. In the end I am going to mix this sand with the dirt I put above it, so you can add it now or mix it with the dirt and then put them in together. If you have cactus potting soil, you can use that instead of the sand/dirt mix.
Step 4: put dirt over sand, mix together. Succulents and cacti need sandy soil. Having sand and soil separate might work (fancy terrariums you can buy often have layers like this) but it's not great for the plants.


Step 5: plant succulents! make sure to space them out a few inches (or more if you have large ones) so they can grow/get sunlight.


Step 6: put a layer of nice looking gravel/sand/rocks over the dirt
Step 7: accessorize! I added more shiny rocks.

Taking care of the terrarium: The terrarium will do best in a south window. Water rarely (once every two weeks is plenty), and make sure not to water so much as to leave standing water at the bottom of the terrarium. Make sure the terrarium is dried out before the next watering. You can fertilize the terrarium with half-strength Miracle-Gro or other houseplant fertilizer, but you don't need to do this too often.


Thursday, December 1, 2011
Equine Osteology: Femur
Equine femur for class, also a little tibia. These are just pencil drawings that I make super-contrasted.


Monday, November 28, 2011
Everyday...

I was certainly not the person who came up with this, but I do enjoy it quite a bit and made a line version for a friend
http://cheezburger.com/View/5175035648 this was the original I used
Monday, November 21, 2011
Oil Pastels: Cow Skull
 Tonight's sketch. Bones can be fairly black and white, but it's interesting to add in color.
Thursday, November 17, 2011
Oil Pastels: Sea Creatures

Sunday, November 13, 2011
Sense of Humerus
I have managed to combine my predilections for drawing t-shirts and bones and drew some bones for a t-shirt.

From left to right: Dog, Horse, Tiger, Bear
Tuesday, November 1, 2011

Friday, October 28, 2011
DIY Spartan Hoplite Costume

Helmet
Shield (Aspis, or Hoplon)
Spear (Dory)
Body Amour (Linothorax)
Greaves
For the original 300 costume, click here
For all costumes click here. For the Batman costume, click here.
Friday, October 21, 2011
DIY Spartan Hoplite Costume: How to make a faux-leather Linothorax, inspired by Gladiator costume, no sewing required!

 For all the Hoplite Costume posts click here!
 So I knew I needed some sort of chest armor for my hoplite costume, but had no idea where even to begin. Then I saw one of Russel Crowe's costumes in Gladiator where he is wearing a leather chest plate that is made by multiple leather straps rather than one continuous piece. This seemed plausible to make, as I have no idea how to forge an actual bronze chest plate or even a solid piece fake leather one. So with that inspiration, I set to work.
I made this as easily as possible because I really can't sew. The only things I did to make this was cutting the fabric and tying a few laces in knots. It's that simple. The design is a little complicated, but hopefully I will describe it adequately here for you! There are many diagrams I made which should make it easier.
The only supplies are a single piece of faux-leather (for costumes), a scissors, and a reel of faux-leather lace (for tying things together).
 I started with 2 1/2 yards of a faux-leather halloween costume fabric (standard fabric roll wide, about 3 feet I think?). The entire costume is made by cutting away at this. There are two things to think about when starting out, which are how long the costume needs to be (knees to shoulders, over shoulders, and back down to knees) and how wide (the main body of the armor is as wide as your stomach/chest, the 'belt' goes around your back once and layers twice over your stomach). That said, I made my basic 't' shaped design. The main body of the armor is the long part, and the belt is the extensions out left and right on what will be the back side. The ends (front and back) of the armor will eventually be free-hanging straps. I measured my chest (measure to the base of your shoulder, not the ends of your shoulders) to determine how wide I needed to keep the fabric, and then my waist to see how long each side of the belt should stick out, then I started cutting.
Once I had my 't' shape, I made the central slit down the middle (where my head will go) so I could put the costume on and see how my measurements added up. I determined one thing right away: do not measure out your full shoulders. This ended up giving me a giant costume that had huge flaps around the stomach. Rather, the chest piece needs to be as wide as your stomach/chest without shoulders so that it stays closer to your body. I trimmed the armor accordingly and also shortened my belt pieces to the correct lengths, then continued on.
 The armor is made up of 4 long straps that go front to back, and I wanted to re-create that but without actually using 4 individual pieces of fabric, so I cut from the shoulders down (front and back) to make the four straps, but did NOT continue them through the belt region, This gave me the look of having 4 straps and the belt will later cover the part where I did not cut. Keeping the entire piece solid like this means much less hassle later on and fewer knots to tie.

 Now done with the top of the armor, I moved onto the belt. The belt is fairly simple: The two flaps coming off the back of the armor are wrapped around to the front and tied down (using the same technique as the shoulder ties, just make two slits in the belt piece and also the piece you are tying it into and run the lace through). Once you've tied down the first belt piece in front, bring the second belt piece from the back have it overlap the first, then tie it down as well. I made the second belt piece into 3 straps by cutting it long-wise (and made one tie for each strap) and also made each end into a triangle. I thought it looked neater. The photos show the first belt tied in (left) and the second belt tied in (right).

Finally, with chest and belt finished, it was time to finish the bottom pieces. I didn't do a lot for these, just cut them into 4 straps (mirroring the chest piece) and made each end in a triangle.
All done!
For all the Hoplite Costume articles click here!
Wednesday, October 19, 2011
DIY Spartan Hoplite Costume: How to make a Shield (Aspis, or Hoplon)


 My Hoplite costume of course needs a shield, and I lucked out that when I first made my 300 costume a friend let me have their saucer sled which was exactly the size I needed for my shield. It was the easiest build ever: Take plastic saucer sled (about $10), drill 4 holes (two per side, to put in laces for holding shield on inside), spray paint brown, then lightly add gold spray paint to make a bronze-ish final color. I also added a spray on varnish to keep the paint from chipping too much. I used brown shoelaces tied through the holes to fit my arm and hand. Done!
 For all the Hoplite Costume Articles, Click Here
Sunday, October 16, 2011
DIY Spartan Hoplite Costume: How to Make Greaves

 See all the Spartan Hoplite Costume articles here!
I wanted to make better greaves (shin-guards, more or less) this year, and I decided to try out Paper Mache. I haven't tried this much before, so I thought it would be interesting to see what the medium can handle. I used a very simple recipe for the paper mache: half glue (white) and half warm water. The final result isn't too bad. The two greaves aren't very symmetrical (probably could improve on that if I did it over again), but they are surprisingly strong and I believe will hold up well. Here's how I did it:
 First, I wrapped my legs in plastic garbage bags so I would have something to build the paper mache off of. Hoplite greaves should be custom-fit, so this way I would make them as accurate as possible.
 I mixed my paper mache (half warm water, half white glue), mixed it well, and cut up newspapers into inch-wide strips. I dipped the newspaper in the glue mix, used my fingers to wipe off excess liquid, and started laying the newspaper onto my shins. I paper mache'd from my ankles to the tops of my knees, and around the sides of my calves. I made the paper mache about 4 layers thick. Once I had my 4 layers, I waited about half an hour so the paper mache could dry enough to stay in the shape of my leg. Then I cut the garbage bags at the back of my leg and removed the greaves. I let them dry completely overnight by putting them over the backs of chairs.
 The next day I reinforced the greaves by putting a layer of duct tape over most of the greaves (but not the entire surface; I wanted to make sure the next layer of paper mache could fuse to the previous layer). Then I added another 4-layer round of paper mache.
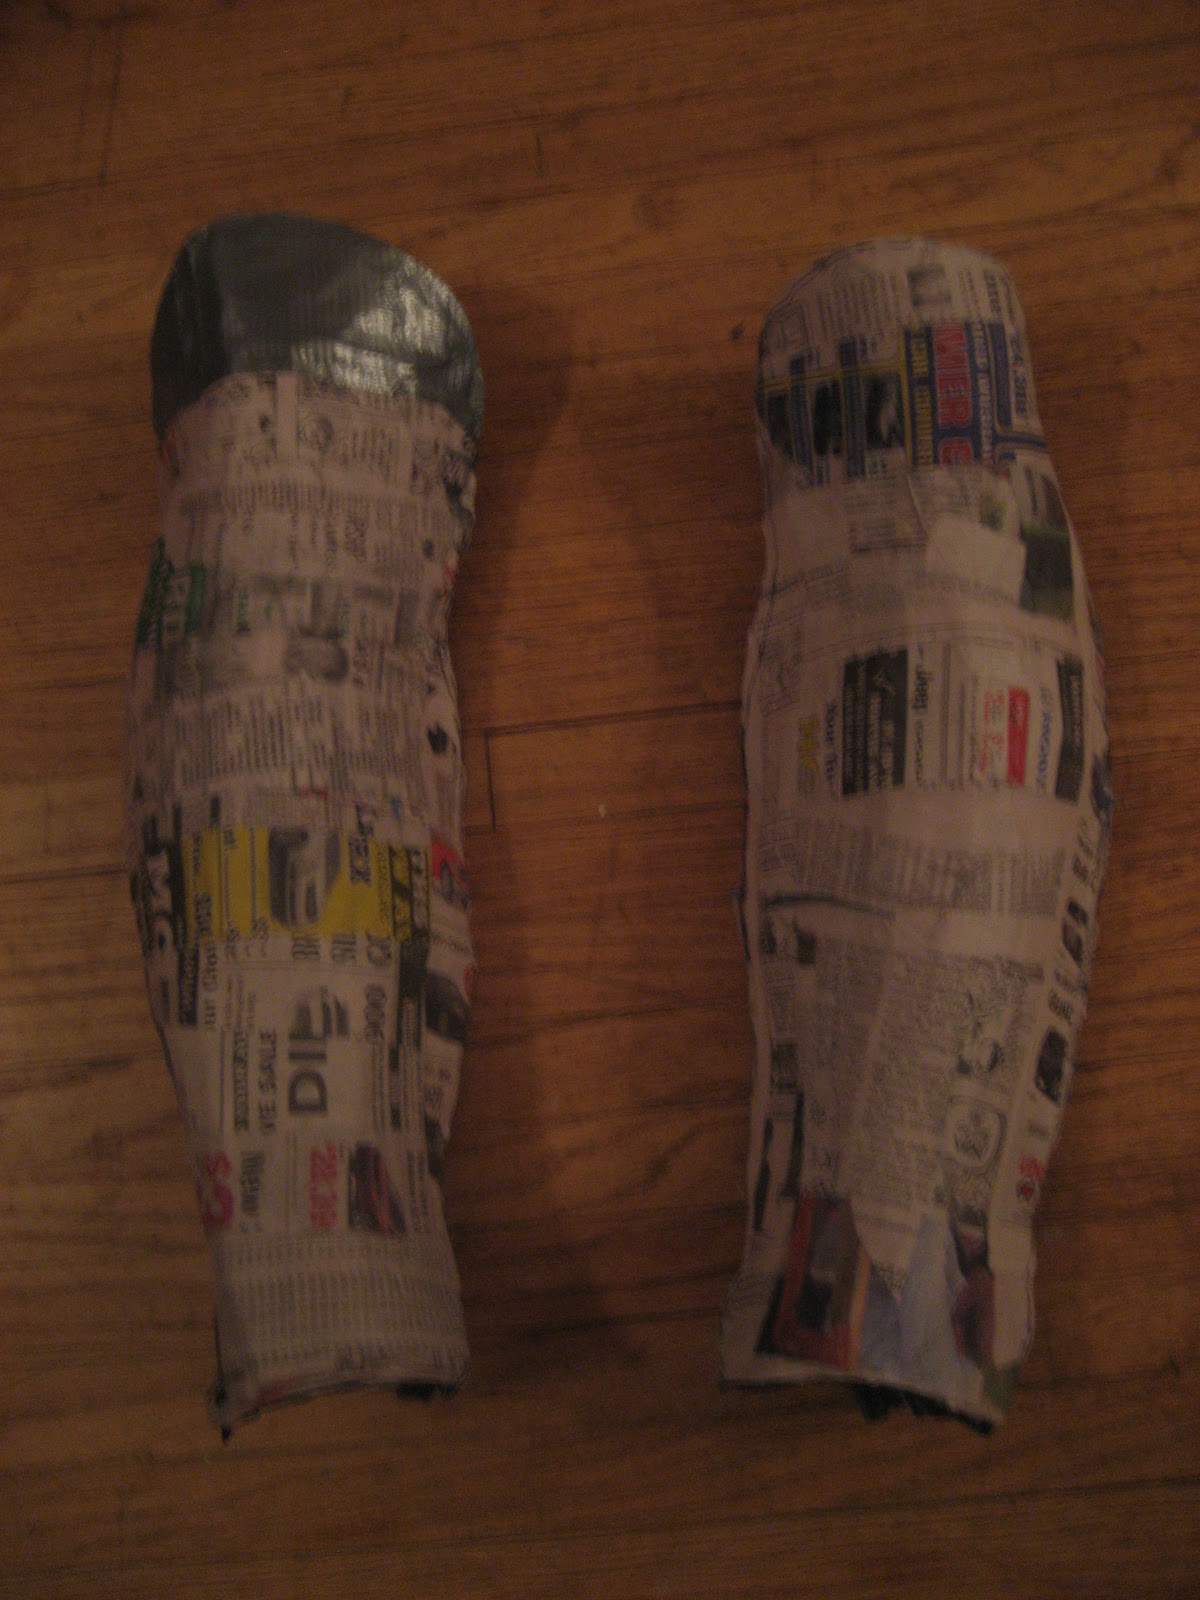 I repeated this a few more times, before I was finally satisfied with how thick and solid the greaves were. I then cut off the excess garbage bags and trimmed the greaves into the proper shape. It turned out I had made one of them too short, so I used duct tape to build a top (knee cap) and then put one final layer of paper mache over that (and also around the edges where I had cut the greaves out).
 Once the paper mache was dry, it was time to paint the greaves. I used an Xacto knife to make 6 holes in each greave for straps. I used spray paint to paint the greaves brown, then a light layer of gold over that for a final bronze-ish appearance.
I made the straps out of fake leather laces, and tied double knots one one side so they wouldn't slide through the holes I had made.

 Finally the greaves were finished! They aren't perfectly smooth, or shaped, but they are decently strong and were super cheap and easy to make. It was also nice to experiment with a new medium and see how strong paper mache can be made to be if you layer it enough.
See all the Spartan Hoplite Costume articles here!
Subscribe to:
Posts (Atom)