Showing posts with label 3D Art. Show all posts

Monday, February 28, 2011

Clay and Wire Poison Dart Frog

I've been reading about poison dart frogs a lot lately, and decided to try to make one for myself.  They are very small creatures, so I tried to go for life size (about an inch long).

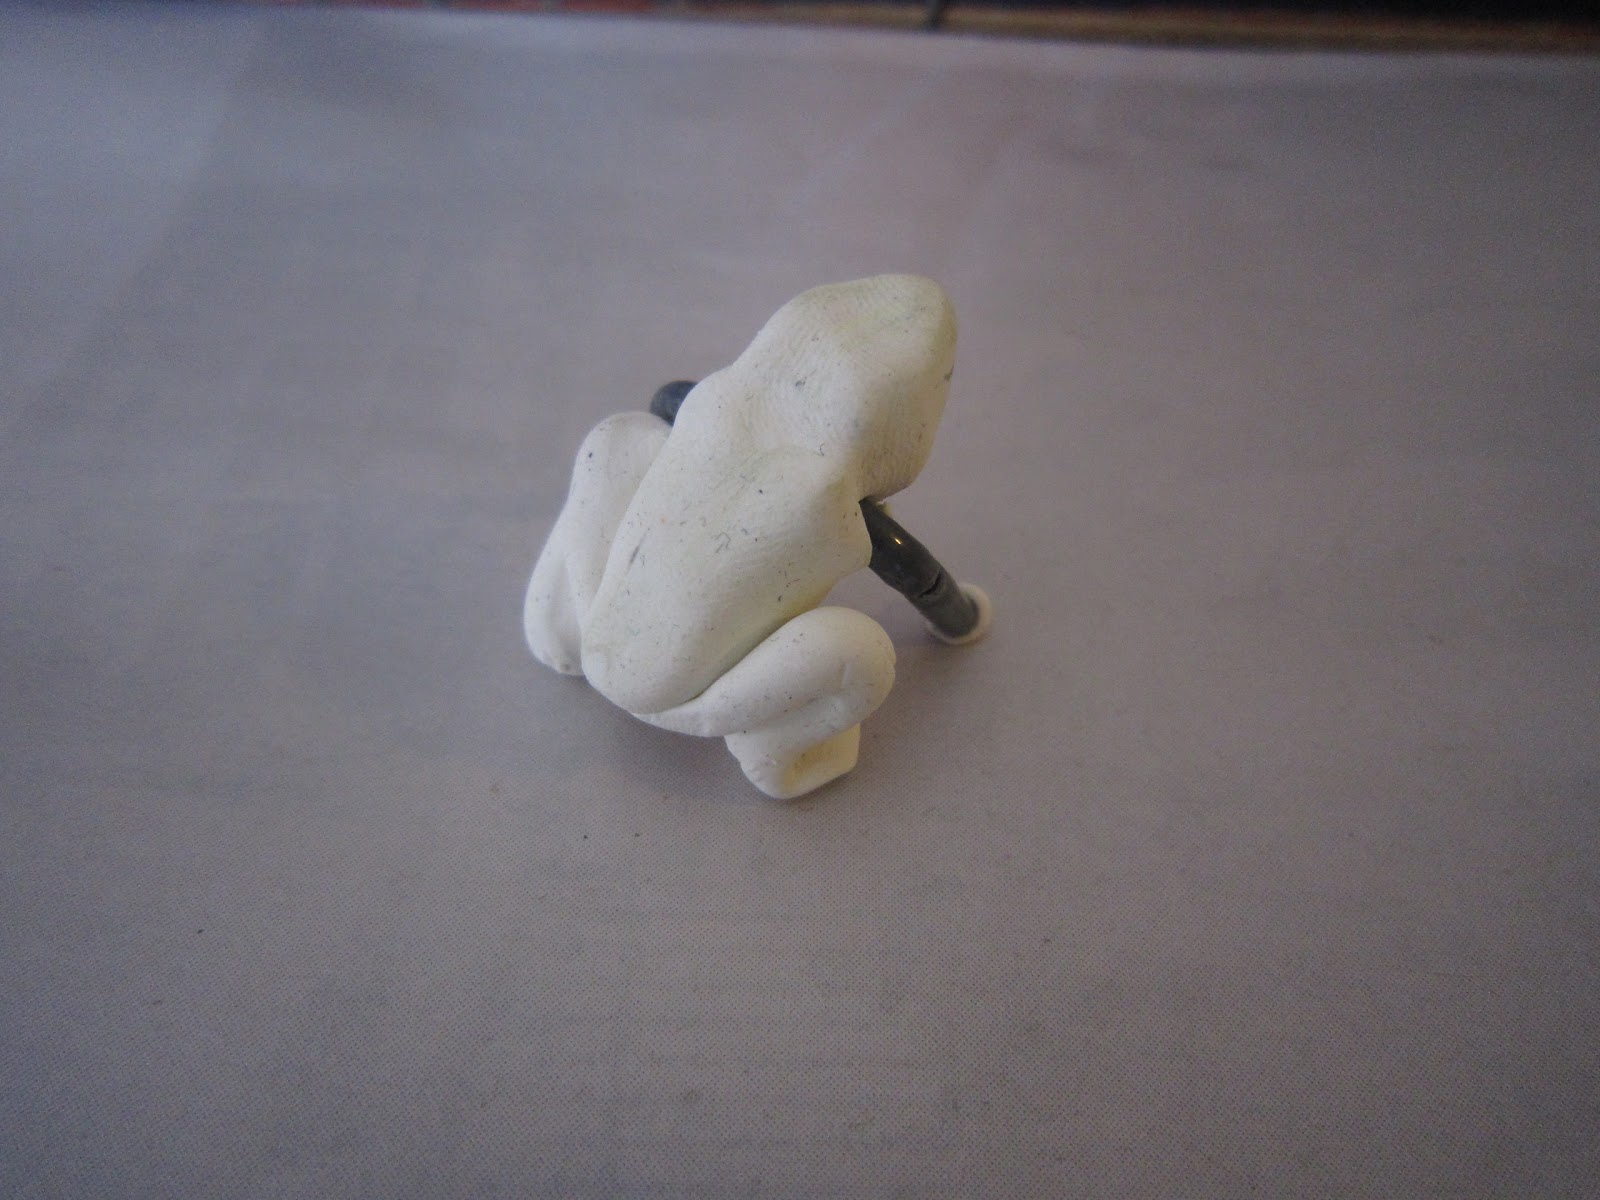
I made the frog out of white Sculpey clay and some phone wire I had around the house (left over from the Batman costume).  Since poison dart frogs usually have very complicated and ornate coloring, I decided to paint the frog rather than make it out of multiple colors of Sculpey.  The wire was necessary because the tiny front legs of the frog refused to stay up when made out of clay, so I replaced them with wire to make sure my frog didn't collapse.  In the end I didn't make any of the toes for the frog, but they quite likely would have just broken off anyways.

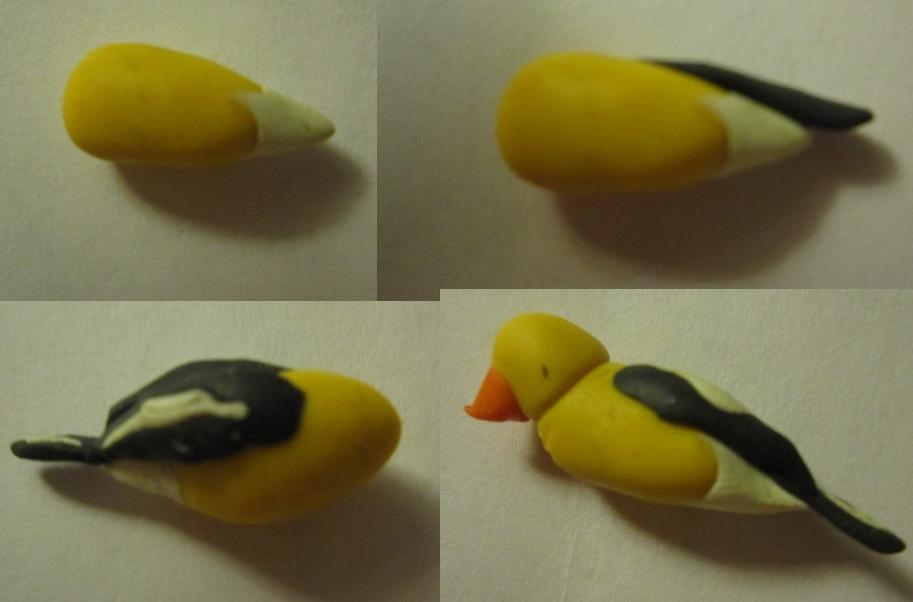
To paint the frog, I first went with a solid yellow base coat.  I did this three times in order to get a very bright, rich yellow color, and also because the wire legs were fairly resistant to being painted.

Once the yellow was on, I added the black.  This particular type of frog is actually black with yellow stripes, but if you paint black first, the yellow will be a hundred times more difficult to get right.

Now that the frog was painted, I added a clear coat of varnish to give it that shiny, wet, amphibian look.  All done!

See all the frogs here!


For this project I used Sculpey clay and Games Workshop paints:
 

Tuesday, June 22, 2010

Clay: Battlestar Galactica Vipers (as Adorable Ornaments)

My latest Sculpey creations.  This time I tried to see what I could make of the Viper ships from Battlestar Galactica.  They are incredibly detailed and complicated ships, so I had to take some liberties in turning them into their geometric basics.

The main bodies of the ships are one long piece (White), with everything else added on top.  Three small white cylinders sit on top of the hull (Yellow). The wings sit underneath them, and the dorsal fin is on top (Green).  The cockpit was added on after the rest of the body of the ship was together (Black box).  The engines are a black diamond (Black diamond), then small black circles (Gray), then smaller blue circles (Blue).  The red stripes were rolled fairly thin, then simply pressed down onto the clay.

The final products are about an inch long.  I wish I had poked holes in the wings because they would make a fun hanging diorama.  Maybe next time.  

Sunday, June 13, 2010

Clay: Songbird toothpicks

I felt like my succulent garden needed a bit more color, so I decided to make some birds for it.  I used Sculpey clay, and made tiny songbirds on top of toothpicks.  The toothpicks allow them to be placed easily into plant pots (or as appetizer picks).  They were very simple to put together.

My favorite part of using Sculpey is reducing complicated objects into their most basic shapes.  It's like the Ed Emberley of sculpture.
The making of the goldfinch is included here.  These were my first attempts at this particular project, so I may try again in the future to get them a little cleaner (and expand the repertoire of birds).


Wednesday, May 19, 2010

Candle Carving: Moai

I was looking around for a short art project when I found my candles I had been using for pysanka.  Inspired by other wax carvings of moai (the heads on Easter Island), I thought I'd give it a try.

I used an Xacto knife to cut the candle.  This turned out to be a great way to go, as candles are soft enough to easily cut through.  I'm used to building sculptures, rather then carving them, so it did take a bit more thinking to figure out where exactly I should be cutting.


After a bit of carving I realized that the nose of the piece would need to be protruding out from the rest of the candle, so I would need to build up the wax.
At first I thought about taking carved off pieces of wax, placing them on the nose, and melting them on.  This turned out to not work at all.  A better solution was to stab a piece of carved off wax with the knife, hold it over the flame, and drip wax onto whichever part I wanted to build onto.  This soft wax could also be easily molded with my fingers (don't touch the wax too soon or you will get burned of course).

I then had to find some way to make the whole thing black, or at least not translucent white, because it was impossible to see.  Remembering working on pysanka, I figured the best way to dye the candle would be with...a candle.  I tried out briefly holding the carved candle over the flame of another candle.  The wax melted a little, which actually helped round out the edges, and the soot from the flame turned it a bit black.
I kept doing this until I felt the head was about as dark as it would get.  Whenever I heated part of the head, I would hold that part face down while the wax cooled.  This way, the melted wax collected on the extremities of the part being heated, and so there was very little loss of shape.

Finally, I rubbed the soot off of the part of the candle that I needed to stay white, and it was finished!

Thursday, May 13, 2010

Costumes: Elven Brooch

A few years ago I made four of these for some hobbits.  No good cloak is complete without one, so here's how I made it:

I carved the main shape out of pink insulation foam.  It's not a great substance in terms of durability, but is very shape-able and fit my needs well.  The wire part is done in three pieces.  There are two half circles (a small and large) and the longer, winding piece.  It was a little tricky to get the wire to loop around through itself like that, but not terribly difficult.  I glued the wire down.  I then painted the leaf two shades of green to give it a little extra depth, then painted on the silver filigree and actually also painted the wire the same silver color.  I varnished the whole thing to give it a bit more shine.  I then glued a pin backing to the back of the piece so I could attach it to a cloak.  

Or you can just buy one

Saturday, May 8, 2010

Green Stuff


There is a fun material called, coloquially, 'Green Stuff,' which is amazing for sculpting on a very tiny scale.  It is actually Epoxy Putty Tape.  It comes in strips of blue and yellow, and when you mix the two components you get a green putty that can be mixed to your own preferences (how sticky it is) and hardens over roughly 24 hours.  It is a great medium to work with for art.  You can also use it for fixing things.  

My first experiment with green stuff was this spider.  It's just a green stuff spider on a rock, which I then painted with a fake gold leaf.  

Becoming more ambitious, I made this Gollum, a la Lord of the Rings, who is on a barkchip rock.  I use densitry tools and toothpicks for shaping the material.     

Miniature Terrain: Rocks and Cliffs

So continuing with foam and plaster miniatures, here are some 'natural' looking things you can make pretty simply. 

Cliffs/Rock Outcroppings:
Like always, start with a pink insulation foam base.  Make the foam base about the size you want the final piece to be, as the plaster layer on top will not be very thick.  I recommend doing this on newspaper because the plaster will adhere to whatever you have the foam sitting on. 


Mix the plaster and layer it on.  First make sure that wherever you want plaster to be, the plaster is at least a few centimeters thick so you will be able to sculpt it.  As the plaster is drying, start carving.  One really easy way to make rock-like features is to crinkle a ball of aluminum foil, and press it into the plaster.  Toothpicks can also be used effectively to draw strirations into the rocks to make them look layered. 
If you draw the lines in with a toothpick, gently press the aluminum foil in afterwards to hide the lines a little.  One of the key factors to all this is to make the impressions when the plaster is dry enough to hold the shape, but wet enough to be moldable.  This may take some practice to get used to.  Once the plaster dries a little further, you can scrape off unwanted bits or carve stronger lines into the plaster.  

For painting these rocks, I used the same idea as I did with the Argonath, and started with black and added succesively whiter layers of paint untill I was just drybrushing white onto the surface.  The ground is just brown with green fake terrain grass glued on. 

Bark chip Rocks:

One way to make small versions of big rocks is to use barkchips or woodchips.  These have naturally fine layers of detail, which, when painted, do a good rock impression.  


To make them, first dry out bark or wood chips (I use bark).  Paint black.  It can be a struggle to get paint down into the finer crevices, but the more thorough a job you do here, the better the final product will be.  Now add a layer of dark gray paint, and don't paint all the way into the deepest crevices.  Next, a layer of lighter gray, again not painting as deep as the previous layer.  Continue this, and as you get lighter, use less paint on your brush each time to help keep the paint from dripping down.  Eventually, drybrush a layer of almost white to finish.  The samples I have here aren't great paint jobs, but show how different textures of bark can make different looking rocks.

Materials Used (or close approximation)


Tuesday, May 4, 2010

Miniature Terrain: Argonath


This is my interpretation of one half of the Argonath from Lord of the Rings. The sculpture is about a foot tall total, and mostly pink insulation foam. I used plaster for parts of the rocky texture, and to coat the figure itself, but the underlying form is all foam. The head is baked modeling clay.

To keep the sculpture and the rock it is built from separate, I made them different shades of gray. The body started with a gray base and worked all the way up to a white drybrushing. The rocks started black and worked up to a medium gray. I should note that it is a total pain to try to paint in small crevices that accidentally occur when using plaster, but the final texture does lend itself to shading in paint.

The head was sculpted in two parts. First I made the face, complete with strangely pursed lips and large nose. Next I layered on the helmet. I sculpted the helmet once it was on the head, not before. By actually having a second piece of clay to make the helmet, I didn't have to mess around too much near the face to make the helmet look separate.

This hand is also made from clay. The other hand and the foot (with sandal) were made by carving the plaster. In retrospect I should have made them all out of clay, because plaster does not take fine detail well (at least not the way I use it) and you have to deal with it setting as you carve it.

The robe is a combination of plaster and foam. Some of the folds were actually carved into the foam base (left arm), while others were made from plaster (right arm).

To give you an idea of the construction, here are some photos of the second one which I started but have not yet completed.

First you start with a foam base. This base includes the rocks and the sculpture, which can be hard to in-vision at first.

Then you add plaster. Once you've added some plaster, you can get a better idea of what you want the foam to be doing, and you can start carving the foam.

Materials Used (or close approximation)


Miniature Terrain: Moria

The Bridge in Moria from The Lord of the Rings: The Fellowship of the Ring. This bridge is constructed entirely from pink insulation foam and plaster. It doesn't really lead to or from anywhere, but it was fun to make.

The rocky walls are insulation foam covered in plaster of paris, detailed to make it seem rock-like. The paint is black followed by some dark reds and browns.

The bridge is just foam, with some plaster over the top to smooth it out a little bit. The painting is various shades of sandy brown over a black base with a hint of blue-green for lichens or possibly oxidized metals (the non-red oxidizing ones).

The pillars started as simple square columns, which i carved away at and also built up on with thin layers of foam for the base. They received the same paint job as the bridge.


Gandalf of course is a must for any such bridge.


Materials and related:

Monday, May 3, 2010

Jewelry Box: Dr Who's TARDIS


For those of you who watch Dr Who, you may recognize the TARDIS. For the rest of you, I made a tiny version of a 1950's British Police Call box. This is a jewelry box I made for Amy a few months ago. It was a fun project, which I more or less made up as I went along.


The Box: I bought a generic wood box at Michael's Arts and Crafts store. I found the one most closely resembling a 1950's British police call box, but the dimensions weren't perfect. It also had rounded edges, which I had to fix later on.
http://www.michaels.com/art/online/home

Shaping the Box: My plan was two fold. Half of the plan was to add on sheets of balsa wood to make the exterior of the box. The other half was to carve into the box to make the exterior. In the end, this worked out ok, though was very touch and go for awhile. I used an x-acto knife to cut out the balsa wood, and a dremel drill to carve the box. The framing of the door (front and back) was two sheets of balsa wood, windows carved into the box, and a sheet of cardboard to fill in a depression that came pre-made in the box. I also used thicker balsa wood to make the base and top of the TARDIS. The sheets of balsa also served to re-create the sharp edges needed for the box.

The Light: This is a round wooden bead with Green Stuff on top for the details (not that I made it very detailed).


The Insides: I bought a hand mirror from Target and pulled the mirror out. This was surprisingly hard to find, as most makeup kits and other sources of small mirrors actually have curved mirrors. Possibly Michael's has easier to obtain mirrors. I carved a space in the door for the mirror to sit in, and then glued it in place. I bought hooks at Menards to screw into the top of the TARDIS for things to hang from.

Painting: I started with a base primer coat of gray. Then I painted the whole thing blue (not solid blue, leaving some dark gray recesses to keep it looking realistic). The windows got progressively lighter (added white) coats of paint layered on, with some finishing touches of dry-brushed pure white. The light on top got the same treatment. The body of the TARDIS then got a slightly lighter blue/gray dry-brush layer.

In case you have no idea what this is all about:
http://www.bbc.co.uk/doctorwho/dw