Thursday, October 31, 2013

DIY Articulated Dinosaur Leg Fossil from PVC Pipe, Aluminum Foil, and Paper-Mache

For Halloween this year I made an articulated Ceratosaurus leg. The final product is about 40 inches tall.  It was pretty cheap to make, and most of the supplies I had at home already except for the PVC pipe and insulation.   

Supplies: PVC pipe (3/4 inch and 1/2 inch), PVC pipe insulation (for the 3/4 inch), aluminum foil, duct tape, white glue, thin wire, coat hanger (metal, used as the main support to keep the leg bent), rope, paint, newspaper (for paper-mache)

I used photos I found online to determine how the leg should look, but I highly recommend you go to your nearest Science Museum and take 360 degree photos of a dinosaur leg for best results!


I started by cutting up a PVC pipe into lengths that more or less mirrored the bone structure I wanted to make. I made the leg based on random pictures I found online, so it was all just guessing.  The leg starts as  a single big bone (femur), then splits to two bones (tibia and fibula), then three bones (plus a bonus bone)(metatarsals), and each of those last bones have toes off the ends.  I used 3/4 inch PVC for the first three bones, then 1/2 inch PVC for the metatarsals/toes.  I ran a single piece of rope all the way through the pipes so that the bones would all be connected (later I tied the rope off where it exited the last toe.  The fibula was tied to the tibia with an extra loop of rope.

Here I covered the top bone (femur) in insulation foam to give it extra bulk, and started forming the end of the bone by adding aluminum foil.     


Since the rope that connected all the bones only ran through one toe, I used wire to make a frame for the rest of the toes to sit in.  The wire was bent at the end of each toe (or aluminum foil added) to prevent them from slipping off.
Here is the partially complete leg, with just the foot to be finished.  Besides the insulation foam on the femur, the rest of the additions are just aluminum foil with a little duct tape here and there to keep it in place.
Once I added aluminum foil to the foot I realized that some of the dinosaurs I was looking at had a 4th toe on their feet.  This 4th digit is usually pretty small, so I didn't want to use PVC pipe, so I just made the 4th toe out of aluminum foil. I also added claws on the ends of each toe with aluminum foil. 


Here you can see the final fully prepped leg before I started the paper-mache.  For paper-mache I use a roughly 50/50 mix of warm water and white glue.  I did a few layers on the larger bones, but the small toe bones mostly just got one layer each.  Make sure you don't cover the ends of the PVC pipes with the paper-mache (you will need them open so that you can run a wire through them later).  Let the paper-mache dry overnight before painting. ideally.
Painting the leg was very simple (though first I tried a variety of other options that did not work). I used cheap acrylic kids paints for the whole thing.  The paint scheme is: 
1) Solid layer of brown paint.  2) Highlights using a mix of about 1/3 brown paint in 2/3 white paint.  
The highlights are done by 'dry-brushing,' which is where you take the brush, dip it in paint, wipe off most of the paint, and then lightly run the brush along the surface of the bones so that only the bits that stick out the farthest will be painted.  

To further highlight the separation between bones, I did NOT dry-brushed the lighter brown color into the spaces where the bones meet (seen best in the foot, where I dry brushed along the original 3 pieces of PVC pipe but not the area between them that was covered by the paper-mache)
After painting, all that was left to do was mount the leg properly. The rope that runs through the entire leg was helpful in keeping the bones next to each other, but does not provide any rigidity to keep them in place.  To fix this, I took an old clothes hanger, straightened it out, ran it through the bones, and then bent it at each joint to make the appropriate pose.  I also poured some white glue into the pipes and at the points where the separate bone sections touch to help keep them in place.  The foot also needed a small piece of a thinner wire on the outside to keep in in the correct position (which I then painted brown so it would be more subtle).  Because of the small wire in the toes, they can be individually moved around.  

**Embarrassingly, the final mounted version has an error! the middle bones (tibia/fibula) are backwards! The photos showing the pre-paper-mache and paper-mache versions have them correctly positioned.** 


Sunday, September 1, 2013

Plant Propagation: Papyrus


Propagating Papyrus plants is rather entertaining as they grow upside down! The plant shown here is Cyperus alternifolius  (umbrella papyrus) I believe.  I also did this same propagation with a Cyperus papyrus but it did not grow quite as well, perhaps due to higher light requirements. 


Propagating this plant is super easy:
Step one: Cut off a stem of the plant.
Step two: Place upside down in water.

All done! Keep the water level relatively consistent, and place in the sunniest place you can find, either a south window or outside is best.  I used a western window and had some success though the plant did much better once it got outside. 


For more plant propagation posts, click here

**Update: It's now been about a year total since I originally rooted the papyrus, and it's still doing great! survived and thrived in a western window all winter. 


Wednesday, August 28, 2013

Mini Monet: The Summer Poppy Field


My first decently sized painting (11x14).  Still working on technique; I need to learn how to use larger brush strokes to get the effect I'm really looking for.  A picture taken during the process shows how it evolved as I worked on it.  Original painting here. 

Friday, August 23, 2013

More Doodles in 3D

Another version of forced perspective doodling and creating 3D effects.  This time with actual 3D!
For my other 3D doodles, click here


Monday, June 10, 2013

Tuesday, May 28, 2013

Mini Monet: The Japanese Bridge

My acrylic 5x7 version of The Japanese Bridge, 1899.  Original painting here.  Tried to do the bridge free-hand, which was a mistake; definitely using a pencil on a string next time to get a decent curve.  Moving into slightly larger but still mini canvasses. 

Monday, May 27, 2013

Mini Monet: Bordighera


Based on Monet's Bordighera, House of the Gardener

Saturday, May 4, 2013

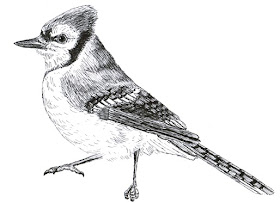
Yellow-rumped Warbler (Myrtle Warbler)

We've had a ton of these little dudes hopping around the place lately.  The poorly edited-in yellow shows where the name comes from.  
For more song bird drawings, click here
For all my song bird art, click here

Thursday, April 18, 2013

Plant Propagation: Pothos (Devil's Ivy)

Pothos is another easy to propagate plant.  Cuttings from a mature plant can easily be rooted in water, and then planted in bunches to make a new, full potted plant.  These are the steps I took to propagate my pothos plant (I am in no way an expert in this field!). 


1) Select a few strands of pothos for cutting.  People generally recommend cuttings around 6 inches long and having a few leaves on each cutting (I did manage to successfully root and grow a plant from a cutting that only had one leaf on it, but that might not always be the easiest way to go about it).  You will want 3-4 clippings to plant in a pot to make it look good. 

2) Cut vines a quarter inch or so below a root node.  These are the little brown bumps that occur every few inches on a pothos vine.  Remove leaves from the bottom few inches of the clipping, but make sure you still have a few left!  If you have a long vine, you can cut it up into multiple pieces as long as each segment has a root node.   


3) Place cuttings in water, making sure the root node (or nodes) are submerged and the leaves are not.  Place the cuttings in filtered light (they don't do well with a lot of direct sun light).  Roots will grow out from the root nodes.  Add water if you notice the water level getting low while the roots are growing.

4) Once roots are 1-2 inches long (this will likely take a couple weeks), carefully plant in regular potting soil.  The roots are fragile, so be careful placing them in the dirt or they may break off!

5) Water often for the first few weeks while the roots establish.


This is my new plant made from three cuttings.
For all my plant propagation posts, click here 

Wednesday, March 20, 2013

DIY Hanging Window Frame Tillandsia (air plant) Terrarium and Wall Art

For Christmas this year I received a broken window frame, six hanging tear drop terrariums, and a gift card to a local plant store.  The idea was to make this rather large 6 piece hanging terrarium, which doubles as a very nice living art installation.  It was a fun challenge! I'm extremely happy with the results, and hopefully this guide will help anyone similarly interested in making a hanging piece of living wall art.  If DIY is too much, items similar to this are available online (particularly on etsy.com, of course) 

The Frame

 
I used an old window frame that was bought for $10.  Since it is an old window frame that looks as if it just fell out of someone's wall one day, it had the following issues:
1) there was broken glass in it
2) there were metal spikes holding in the glass
3) it was covered in what was likely lead paint
4) it was full of splintering wood
5) it was structurally unsound
Do not scrape lead paint or remove glass without appropriate protective equipment! I am not an expert and cannot give you guidance for that.  I fortunately had the help of someone who does know what he is doing, and so the glass was tapped out safely, the glass holding metal pieces removed with pliers, and the lead paint scraped off.  In terms of the structure of the frame, we had to remove a few old screws and some rotting wood, then drilled in new screws and added supporting wood pieces in one or two places.
Better idea: for a little extra money, see if you can buy a frame that is already cleaned up, or have a friend who has a workshop who can help you out.
I painted the frame a dark yellow, and after a coat or two it was looking like new!  Well, it looked respectable at least.

The Glass Globes

I used six of these glass tear-drop shaped terrariums and hung one from each section of the window using medium Sisal string.

The Scenery


I was given a mixed bag of various dried mosses and red sand that combined nicely to make for a variety of terrarium settings.  Be creative with what you put into these; rocks, twigs, sand and moss can all look good in pretty much any combination.  Do not put too much moss in as it traps water and that can potentially hurt the air plants.  I tried to keep all my moss towards the back of the globes and the air plants in front so that there is limited contact between them.  

The Plants

I went to my local flower/plant store and bought an assortment of Tillandsia plants.  Similar to my thinking with succulent gardens, I bought a variety of types and whichever ones survive best I will keep.  There are a large number of species of Tillandsia, and the variety of foliage makes the hanging terrariums more interesting.
Plant Care:
I soaked the plants for about 20 minutes before putting them into the globes.  Looking around online there is debate as to whether tillandsia must be soaked regularly or if very intense misting is sufficient to water them, but either way they do need regular watering (despite being called air plants they do not actually get sufficient moisture to survive on humidity alone). Do not water them in such a way that they are left in standing water; either heavily mist them or soak them for 20 minutes and then let the water run off before returning them to their terrariums.  Do not place these plants in direct sunlight! They like bright indirect light.   


 Mounting the frame:

The window frame is quite heavy, so we needed a rather large hooked screw to hold it up on the wall, along with a stud finder to make sure the screw is actually secured well into the wall.  Drywall is not going to support something this heavy.  We put two eye-hook screws into the top of the frame, then tied a rope through them and hung it up.  Make sure you get rope and screws that are strong enough for the weight of the window frame you use!